How to sell digital products: a complete guide
Selling digital products is an excellent option for starting an eCommerce business. Digital assets require minimal upfront investment and eliminate the complexities of managing physical inventory and shipping logistics.
Digital goods can be easily created, updated, and distributed online, allowing new entrepreneurs to test and refine their products quickly based on customer feedback.
In this guide, we’ll delve into the specifics of finding your product niche. You’ll learn how to identify and create high-quality digital products, choose the right platform for your store, and effectively market your products to attract and retain customers.

How to sell digital products
Selling digital goods involves several key steps: creating high-quality products, setting up an online store, and marketing it effectively.
Find your niche
Start by identifying a niche for your digital product. This helps you pinpoint specific market segments where your products can meet unmet needs, ensuring a higher chance of success.
For example, if you are passionate about photography, you could create and sell a course on advanced photo editing techniques, targeting aspiring photographers who want to enhance their skills.
Research trends
Use tools like Google Trends and Amazon Best Sellers to find out what’s currently in demand. These tools help you spot gaps in the market that your digital products can fill.
Check out online marketplaces like Etsy and eBay to see which niche products are trending and what customers are searching for. This research can give you ideas on what kinds of digital products might be successful in your field.
Audience analysis
Figure out who your ideal customers are by looking at details like:
- Age
- Gender
- Where they live
- Their interests, values, and lifestyle
Create profiles of these typical customers, known as buyer personas, to get a clearer picture of who you are targeting.
Join social media groups and online forums that focus on your niche to see what your potential customers are talking about. This direct interaction can help you understand their needs and discover opportunities to answer them better.
Competitive analysis
Look at what your competitors are offering and see what they do well and where they fall short. This can help you find opportunities to offer something different or better.
Look for ways to make your product stand out, whether through unique features, higher quality, or better customer service. This can help you attract customers in a crowded market.
Create high-quality digital products
Creating digital downloads involves some planning and access to the right tools. Here’s a simple guide to help you create digital products from scratch.
Plan your product
Once you have a solid idea for your digital goods, the next step is to plan your product. Start by creating an outline of its features.
If you’re making an eBook or an online course, list the main topics and subtopics. For software or apps, decide on the key features and how users will interact with them.
Think about what you want your product to achieve. Is it solving a problem, teaching something new, or providing entertainment? Break down your content into small, manageable parts and create a step-by-step plan for development, testing, and launching.
Production tools and professional help
Using quality tools is key to creating high-quality digital products.
Use software like Adobe Creative Suite or Canva to design eBooks, digital art, and graphics. Canva is great for beginners and offers many templates and design elements.
Tools like Final Cut Pro, Adobe Premiere, or Audacity are excellent choices for creating videos and audio content.
If you’re developing software or apps, use platforms like GitHub for version control and Visual Studio Code for coding.
For tasks you’re not comfortable with or lack the skills for, consider hiring freelancers or agencies. Websites like Upwork and Fiverr can connect you with professionals for graphic design, content writing, video editing, and more.
Create the product
With your plan and tools ready, it’s time to create your digital product. Follow your plan to design and develop your product, making sure it’s user-friendly and meets your audience’s needs.
Use high-quality resources to create content that is well-organized, engaging, and professional. For software, testing is crucial. Release a beta version to a small group of users to gather feedback and identify any issues or areas for improvement.
Use the feedback to refine and enhance your product before the final release. Continuous improvement based on user feedback ensures that your product stays relevant and valuable to your customers.
Value proposition and customer feedback
Defining your value proposition is essential to show why your product is the best choice for your customers.
Make sure your product solves a specific problem or meets a need for your target audience, and highlight how it can make their lives easier or better.
After launching your product, continuously collect feedback through surveys and customer reviews to identify areas for improvement.
Regularly updating your product with new features, improved functionality, or refreshed content shows customers that you are committed to providing ongoing value. This keeps your product relevant and valuable to your audience.
Sell through third-party marketplaces
When selecting a platform for selling your digital downloads, pay attention to features that will make the process smoother, especially if it’s your first time setting up an online store:
- Ease of use. A user-friendly, drag-and-drop interface makes it easy for users with no coding experience to create a professional-looking store.
- Integrated features. The platform should include built-in eCommerce tools like secure payment gateways, tools for search engine optimization (SEO), and customizable templates.
- AI assistance. AI tools can greatly assist in designing your store and optimizing product listings.
- Scalability. As your business grows, you might need more advanced features and higher performance capabilities. Look for platforms offering scalable solutions that can accommodate your growing business needs without requiring a platform change.
- Customer support. Reliable customer support is crucial, especially for beginners who might need assistance with setup and troubleshooting.
- Cost-effectiveness. Consider the cost of the platform, including any additional fees for features or transactions.
- Security features. It is essential to ensure the platform provides robust security features, like firewalls and SSL certificates, to protect your and your customers’ data.
Third-party platforms and marketplaces can help you reach a larger audience quickly, but they have their own set of pros and cons:
Pros:
- Access to a large, existing customer base
- Quick and straightforward setup process
- Built-in marketing tools to help promote your products
Cons:
- Platforms charge fees or take a commission on each sale
- Less control over branding and customer experience
- High competition with other sellers
- Limited access to customer data controlled by the platform
Common third-party platforms include the following:
Shopify

Shopify offers comprehensive eCommerce tools, customizable themes, app integrations, built-in payment processing, and extensive analytics. It’s a scalable platform for both small and large businesses and is supported by a strong community and extensive customization options.
However, the platform comes with significant costs, including monthly fees ranging from $29 to $299, plus transaction fees unless using Shopify Payments.
The reliance on multiple apps and plugins can also complicate the setup process, making it less straightforward for beginners compared to other platforms.
Etsy

Etsy gives sellers access to a large customer base, particularly for handmade and vintage items, as well as unique digital products. The platform features an easy listing builder, built-in marketing tools, and analytics.
Despite this, Etsy charges a $15 setup fee, a $0.20 listing fee per item, a 5% transaction fee, and a 3% plus $0.25 payment processing fee per sale. These fees can add up quickly, reducing your overall profit margins.
Additionally, the high competition on Etsy means that standing out can be challenging, requiring more marketing and branding effort than other platforms.
Amazon

Amazon is a massive marketplace with robust search functionality and order fulfillment services. The platform provides sellers access to a huge customer base and various promotional tools.
However, the costs can be substantial. There is a $0.99 per item fee for individual sellers or $39.99/month for professional sellers, plus referral fees ranging from 6% to 45%, depending on the category.
The competition is also fierce, and maintaining a strong presence on the platform requires continuous effort and investment. Unlike more customizable platforms, Amazon also offers limited control over branding and customer experience.
Payhip

Payhip is a simple-to-use platform with built-in marketing tools and secure hosting for selling digital products.
However, even the free plan includes a 5% transaction fee. Paid plans with lower transaction fees, on the other hand, start from $29/month.
While Payhip is user-friendly, it lacks the comprehensive features and customization options available on more robust platforms.
Sell through your own store
Creating your own website to sell digital products helps you have full control over every aspect of the branding and selling journey. Most of the time, the pros outweigh the cons:
Pros:
- Full control over branding, pricing, and customer experience
- Higher profit margins without third-party fees
- Direct customer relationships enhance loyalty and repeat sales
- Customizable to create a unique shopping experience
Cons:
- Initial setup can require some time and effort
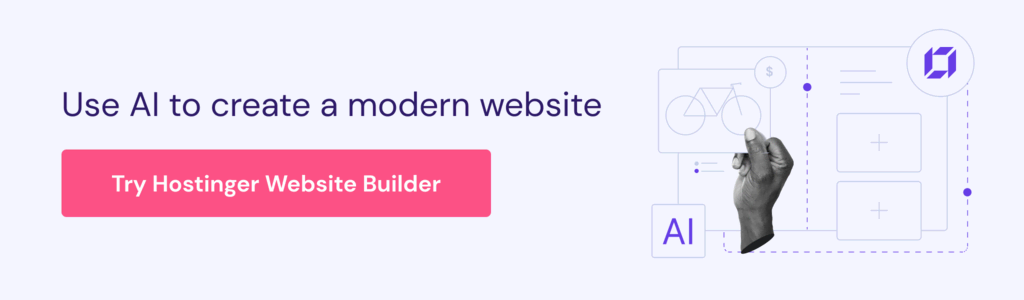
Hostinger AI eCommerce Website Builder

Hostinger Website Builder is designed to make setting up an online store easy, especially for digital products. The platform features a user-friendly drag-and-drop interface and a variety of customizable templates tailored for eCommerce.
The built-in SEO tools help optimize product pages and content to attract organic traffic. The platform also integrates secure payment gateways like PayPal and Stripe to ensure smooth transactions.
The AI-driven design suggestions help first-time sellers create optimized store layouts, enhance product listings, and develop effective marketing strategies.
Hostinger’s scalable hosting solutions grow with your business, and robust security features, including free SSL certificates, protect your data and your customers. The 24/7 Customer Success team ensures that any questions during the setup process are resolved promptly.
Hostinger Website Builder is also competitively priced, with the Business Website Builder plan costing only £3.79/month.
Unlike other platforms that charge transaction fees, Hostinger does not charge any hidden fees on top of the monthly subscription, maximizing your earnings. The platform’s comprehensive eCommerce features and easy setup flow ensure you can start selling digital products in no time.
Follow the guide below to set up a store specifically for digital products:
- Go to the eCommerce Website Builder landing page and choose the Business Website Builder plan. Then, follow the checkout process to pay for your purchase.
- Click Start creating and use AI to craft a bespoke website for your online business. You can also choose a pre-made website template.
- Describe your website – provide the type of your site, the brand name, and what your website or brand is all about. When done, click Create website.

- Wait while the AI builder creates your website.
- Preview your site. If you’re happy with the result, click Edit to start editing and customizing your store. If you want to adjust the website type, brand name, or site description, click Back to AI form.
- Name your store and click Continue.
- Set your store country and currency and click Continue.
- Follow the store setup checklist to add your digital products to your store, set up payment methods, shipping options, and more. For more in-depth information, follow our guide on how to make an online store with Hostinger Website Builder.

- Customize your store design by clicking on Edit website and opening the website editor.
- Use the drag-and-drop interface to add text, images, buttons, and other page elements to your pages. When you’re ready to publish your store, click Go live.
- Connect your store to a custom domain by clicking Connect domain.

- Follow the on-screen instructions and click Next.
- Your store is now published.
Promote your digital products
Effective marketing strategies bring visitors to your store and turn them into customers. Here are some simple tips and examples to get started.
Content marketing
Start a blog related to your niche. Write helpful posts that provide value to your audience and subtly promote your products. This improves your search engine rankings and establishes you as an expert in your field.
If you’re selling digital art tutorials, write blog posts like 5 Tips for Beginner Digital Artists or How to Choose the Best Digital Art Software.
Create video content showing how to use your products and their benefits. Platforms like YouTube can help you reach a wide audience and drive traffic to your store.
For example, if you sell cooking eBooks, make a video titled Quick and Easy Recipes from Our eBook and link to your store in the video description.
Email marketing
Collect email addresses on your website by offering free downloads or exclusive discounts in exchange. Send regular newsletters with updates, promotions, and valuable content to keep your audience engaged.
For instance, offer a free sample chapter of your eBook in exchange for email sign-ups. Follow up with a newsletter featuring recipes, cooking tips, and special discounts on your full eBook.
Use email marketing tools to automate welcome emails, reminders for abandoned carts, and follow-ups after purchases. This helps increase sales and keeps customers coming back.
Consider setting up an automated email to welcome new subscribers with a special discount code for their first purchase.
Search engine optimization (SEO)
Use tools like Google Keyword Planner to find relevant keywords for your products and include them in your product descriptions, blog posts, and website content.
If you’re selling graphic design templates, include keywords like best graphic design templates, affordable design resources, and customizable design templates in your website content.
Make sure your website’s meta titles, descriptions, and headings are optimized for search engines. Ensure your site is mobile-friendly and loads quickly to improve its ranking on search engines.
For example, optimize your meta title and description like this:
Meta title: High-Quality Graphic Design Templates | YourBrand
Meta description: Discover a wide range of customizable graphic design templates to enhance your projects. Shop now at YourBrand.
Social media marketing
Choose social media platforms that match your target audience. For example, Instagram and Pinterest are great for visual products, while LinkedIn might be better for professional services.
If you sell digital photography courses, post beautiful photos, photography tips, and behind-the-scenes shots on Instagram and Pinterest. Use relevant hashtags like #PhotographyTips, #LearnPhotography, and #DigitalPhotography.
Post engaging content regularly, such as tips, behind-the-scenes looks, and customer testimonials. Use hashtags and join relevant conversations to increase your reach.
Consider sharing customer success stories or reviews on your social media channels to build credibility and engage potential customers.
Influencer and affiliate marketing
Work with influencers who have followers that fit your target market. Influencers can create authentic content promoting your products and drive traffic to your store.
For instance, if you sell fitness eBooks, partner with a fitness influencer to create a video review or a workout routine from your eBook.
Set up an affiliate program to encourage others to promote your products. Offer them a commission on sales made through their referrals.
For example, you could offer a 10% commission to bloggers who write about digital products and include affiliate links to your store.
Best digital product ideas to sell online
Selling digital products is a lucrative opportunity to make money online, especially when focusing on high-demand categories. Here are some of the top categories to consider:
eBooks

eBooks are a popular digital product category with a wide range of sub-genres that attract various audiences.
Popular categories include self-help, business, cooking, health and wellness, and fiction. eBooks that delve into niche subjects also perform well, especially when they address specific interests or solve particular problems.
For instance, specialized hobbies or professional advice tailored to a unique audience can capture significant market interest and generate consistent sales.
Online courses
Online courses have become increasingly popular as more people look to learn new skills or hobbies from the comfort of their homes.
Courses on professional skills such as coding, digital marketing, and graphic design are in high demand due to their potential to enhance career prospects. Additionally, hobbyist courses on topics like photography and cooking attract a broad audience seeking personal enrichment.
Self-improvement courses focusing on mindfulness, fitness, and personal development also continue to grow in popularity, appealing to individuals looking to improve their overall well-being.
Software and apps

Software and apps are types of digital products that help people work more efficiently and complete specific tasks.
This includes tools for managing time, projects, and tasks, like productivity apps. There are also apps designed for particular industries, such as graphic design software or customer management tools, which help professionals in those fields with their unique needs.
Music and audio files
Music and audio files are another valuable digital product category for aspiring musicians and audio enthusiasts.
Royalty-free music tracks and background music are perfect for content creators who need background music for videos, presentations, and projects without paying ongoing fees.
Sound effects, on the other hand, are important for video producers and game developers to enhance their creations.
Digital art and graphics

Digital art and graphics include a variety of creative assets that designers and marketers frequently use. This category features illustrations, graphic templates, and stock photos, which are essential for creating visually appealing digital content.
Icons and fonts also play a significant role in enhancing the aesthetic appeal of websites, marketing materials, and other digital projects.
Printable items
Printable items offer a unique blend of digital files and physical products. This category includes customizable stationery templates for invitations, prints, and cards, among others, which users can print and use as needed.
Planners and calendars are popular organizational tools that customers can print and incorporate into their daily routines.
Party decorations and educational worksheets are other examples of printable items that cater to specific needs, such as themed events and home-based learning activities.
How much can you make selling digital products?
The amount of money you can make selling digital products depends on various factors, such as:
Product type
Software, in-depth online courses, and specialized tools usually have higher prices and can make a lot of money. For instance, coding bootcamps or professional software can sell for hundreds or thousands of dollars.
Items like printables, stock photos, and simple eBooks are cheaper but can still be profitable when sold in large quantities, usually priced between a few dollars to around $20 each.
Pricing strategy
To set your prices, look at what your competitors are charging. Remember that if your product is unique or offers extra value, you can charge more.
For example, niche eBooks or exclusive online courses can be priced higher because of their specialized content.
Consider offering different pricing levels or bundles to appeal to various customers. This approach can boost your average order value by encouraging customers to buy higher-priced or multiple products.
Marketing efforts
Your marketing efforts can significantly impact how much money you make from selling digital products.
Create valuable content, such as blog posts, tutorials, and videos, that highlight your products’ benefits to improve your website’s search engine ranking.
This approach increases your visibility and attracts potential buyers. Paid ads on platforms like Google Ads, Facebook, and Instagram can further boost your reach. It’s important to target your audience effectively and create compelling ads to get the best return on investment.
Building and nurturing an email list lets you promote new products, special offers, and updates directly to your audience, driving repeat sales and increasing customer loyalty.
How to grow your digital product business
Growing your digital product business involves smart strategies to increase your revenue and expand your market reach. Consider the following ideas:
Expand product line
Keep adding new products to attract new customers and encourage repeat purchases.
For instance, if you sell eBooks, you might add related online courses or printables. Create products that go well together, like a bundle of graphic design templates and a course on using design software.
Bundling can make your products more attractive and increase the average transaction size.
Automation
Use Hostinger Website Builder’s AI Writer to create unique content fast for product descriptions, seasonal ad campaigns, and new landing pages. Simply describe the type of content you need, and the AI will create the text for you.
Use tools like Mailchimp or HubSpot to automate email marketing, social media posts, and ad management. This saves time and keeps all communication consistent.
Set up sales funnels to guide customers from awareness to purchase, using automated email sequences, retargeting ads, and upsell offers to maximize conversions.
Partnerships and collaborations
Collaborate with influencers who have an audience that matches your target market. Influencers can create genuine content that promotes your products and drives traffic to your store.
Set up an affiliate program to encourage others to promote your products. Affiliates earn a commission on sales they generate, helping to expand your reach and boost sales without upfront costs.
Customer loyalty programs
Implement loyalty programs to reward customers for repeat purchases, referrals, and social media engagement. Offer points, discounts, or exclusive access to increase customer retention and lifetime value.
Provide loyal customers with exclusive content, early access to new products, or special discounts, creating a sense of community and exclusivity.
Conclusion
Selling digital products involves a series of well-coordinated steps, from identifying your niche and creating high-quality products to choosing the right platform and implementing effective marketing strategies.
By choosing a platform like Hostinger AI eCommerce Website Builder you can effortlessly create a store that’s easy to use, comes with comprehensive features, and is cost-effective
By following the strategies and steps outlined in this guide, you will be well on your way to establishing a successful digital product business. With dedication and the right approach, you can build a thriving online store that stands out in the digital marketplace.
Sell digital products FAQ
Find answers to the most common questions about how to sell digital products below.
How can I keep my digital products safe from piracy?
Use digital rights management (DRM) tools, watermarks, and secure delivery methods to protect your digital products from unauthorized distribution.
How do I price my digital products?
Research your market and competitors, consider your costs, and set a price that reflects the value of your product while remaining attractive to customers.
Do I need technical knowledge to sell digital products?
While technical knowledge can be helpful, platforms like Hostinger’s AI eCommerce Website Builder are designed to be user-friendly, making it easy for anyone to set up and manage an online store without extensive technical skills.

Matleena is a seasoned Content Writer with 5 years of content marketing experience. She has a particular interest in emerging digital marketing trends, website building, and AI. In her free time, Matleena enjoys cups of good coffee, tends to her balcony garden, and studies Japanese. Follow her on LinkedIn

Comments
January 14 2024
I have a hostinger website, I've just started.How do prevent theft of my digital artwork. I know that I should watermark my digital artwork.I'm new to hostinger.I just need some guidance in setting up my artwork with a watermark.This concerns me.
January 24 2024
Hi there! For a more detailed and personalized guidance, I recommend reaching out to our Customer Success Team. We will be happy to assist you further ?