How to Install Tomcat on Ubuntu in 2024
Tomcat, often called Apache Tomcat, is one of the most popular applications designed to execute a Java servlet and render web servers with Java page coding.
It is an open-source application released by Apache Software Foundation. Many developers favor it! That’s why in this tutorial, we’ll show you how to install Tomcat on Ubuntu and set it up for use on your VPS host.
Tomcat generates JSP files (server-generated webpages similar to PHP and ASP files) into Java code, further compiling to .class files by the server, and executed by the Java virtual machine. As of today, Tomcat is definitely one of the more useable servlet containers available.

Prerequisites
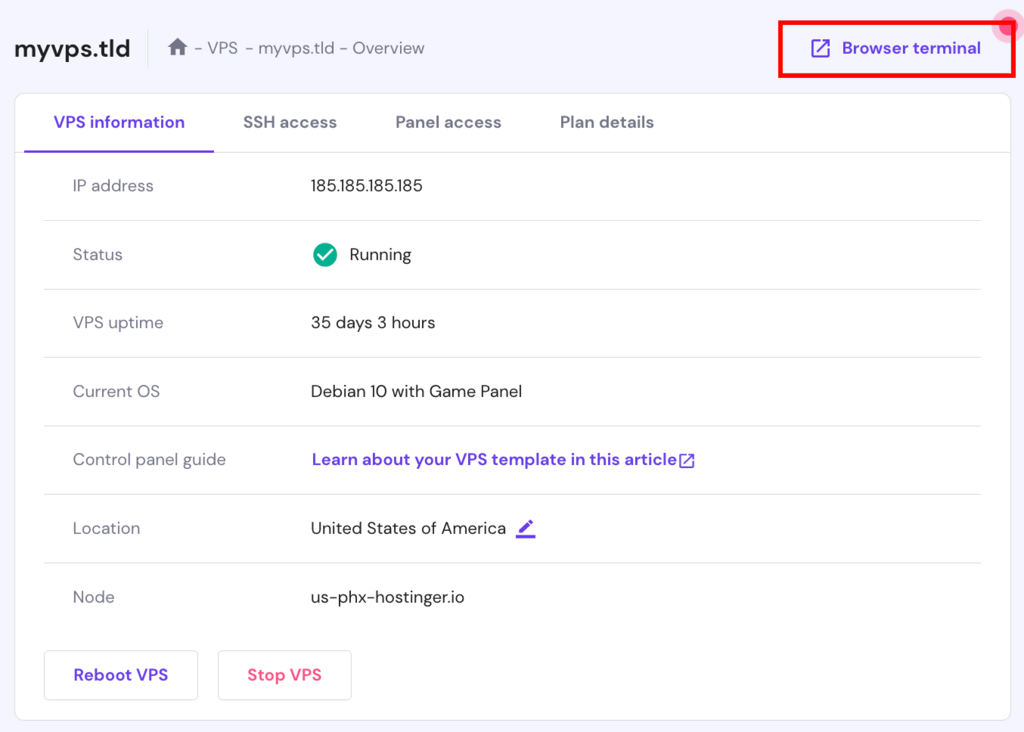
Before you begin with the guide, have a non-root user with sudo privileges set up on your server. Remember to access your server with SSH. Check out our PuTTY tutorial if you’re having issues. Alternatively, you can access our browser-based SSH terminal straight from hPanel:

How to Install Tomcat on Ubuntu
This tutorial will teach you how to install Tomcat 9 on Ubuntu, and how to configure it for use.
1. Install Java
Before we install Tomcat on Ubuntu, we need to install Java to execute the Java web application code. OpenJDK is the default Java development in Ubuntu. Installing Java is simple and quick. Just follow the below commands:
sudo apt update
Install the OpenJDK package by running:
sudo apt install default–jdk
Now that JDK is installed in your system, you can create the user tomcat by following the next step.
2. Create Tomcat User
For security, you should not use Tomcat without a unique user. This will make the install of Tomcat on Ubuntu easier. Create a new tomcat group that will run the service:
sudo groupadd tomcat
Now, the next procedure is to create a new tomcat user. Create user members of the Tomcat group with a home directory opt/tomcat for running the Tomcat service:
sudo useradd -s /bin/false -g tomcat -d /opt/tomcat tomcat
3. Install Tomcat on Ubuntu
The best way to install Tomcat 9 on Ubuntu is to download the latest binary release from the Tomcat 9 downloads page and configure it manually. If the version is not 9.0.60 or it’s the latest version, then follow the latest stable version. Just copy the link of the core tar.gz file under the Binary Distributions section.
Now, change to the /tmp directory on your server to download the items which you won’t need after extracting the Tomcat contents:
cd /tmp
To download from the copied link (from Tomcat website), use the following curl command:
cucurl -O https://dlcdn.apache.org/tomcat/tomcat-9/v9.0.63/bin/apache-tomcat-9.0.63.tar.gz
4. Update Permissions
Now that you finished the install of Tomcat on Ubuntu, you need to set up the Tomcat user to have full access to the Tomcat installation. This user needs to have access to the directory. Follow the steps below:
sudo mkdir /opt/tomcat
cd /opt/tomcat
sudo tar xzvf /tmp/apache-tomcat-9.0.*tar.gz -C /opt/tomcat --strip-components=1
Now, give the Tomcat group ownership over the entire installation directory with the chgrp command:
sudo chgrp -R tomcat /opt/tomcat
Next, you need to give the Tomcat user access to the conf directory to view its contents and execute access to the directory itself:
sudo chmod -R g+r conf
sudo chmod g+x conf
Make the Tomcat user the owner of the web apps, work, temp, and logs directories:
sudo chown -R tomcat webapps/ work/ temp/ logs/
Suggested Reading
Check out our other article to learn more about changing permissions and owners in Linux using command-line interface.
5. Create a systemd Unit File
We will need to create a new unit file to run Tomcat as a service. Open your text editor and create a file name tomcat.service in the /etc/systemd/system/:
sudo nano /etc/systemd/system/tomcat.service
Next, paste the following configuration:
[Unit]
Description=Apache Tomcat Web Application Container
After=network.target

[Service]
Type=forking

Environment=JAVA_HOME=/usr/lib/jvm/java-1.8.0-openjdk-amd64/jre
Environment=CATALINA_PID=/opt/tomcat/temp/tomcat.pid
Environment=CATALINA_Home=/opt/tomcat
Environment=CATALINA_BASE=/opt/tomcat
Environment=’CATALINA_OPTS=-Xms512M -Xmx1024M -server -XX:+UseParallelGC’
Environment=’JAVA_OPTS.awt.headless=true -Djava.security.egd=file:/dev/v/urandom’

ExecStart=/opt/tomcat/bin/startup.sh
ExecStop=/opt/tomcat/bin/shutdown.sh

User=tomcat
Group=tomcat
UMask=0007
RestartSec=10
Restart=always

[Install]

WantedBy=multi-user.target
Save and close the file after finishing the given commands above.
Next, Notify the system that you have created a new file by issuing the following command in the command line:
sudo systemctl daemon-reload
The following commands will allow you to execute the Tomcat service:
cd /opt/tomcat/bin
sudo ./startup.sh run
6. Adjust the Firewall
It is essential to adjust the firewall so the requests get to the service. Tomcat uses port 8080 to accept conventional requests. Allow traffic to that port by using UFW:
sudo ufw allow 8080
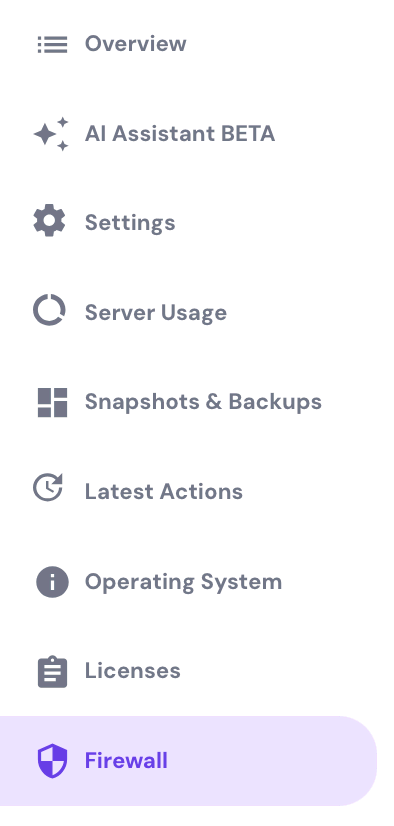
You can also set up a firewall via hPanel. Select your VPS and navigate to the Firewall section:
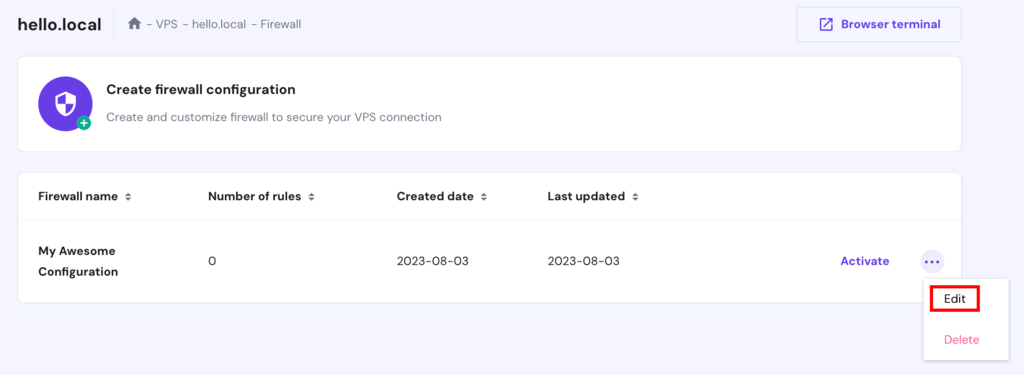
Then create a new firewall configuration and give it a name. Once created, click the Edit button:
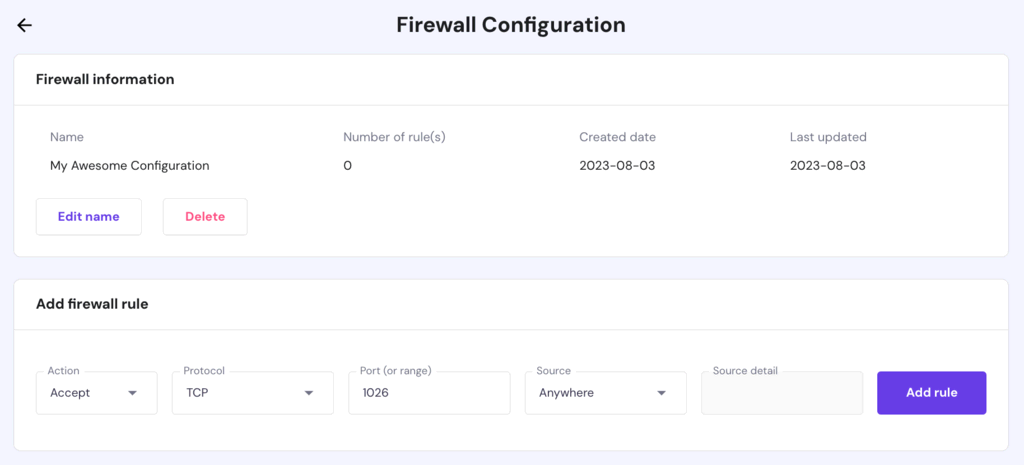
Lastly, add any preferred configuration and click Add rule:
Follow the command below to access the splash page by going to your domain or IP address followed by :8080 in a web browser – http://IP:8080
7. Configure the Tomcat Web Management Interface
Follow the command below to add a login to your Tomcat user and edit the tomcat-users.xml file:
sudo nano /opt/tomcat/conf/tomcat-users.xml
Now, define the user who can access the files and add username and passwords:
tomcat-users.xml — Admin User
<tomcat-users . . .>
<tomcat-users . . .>
<user username="admin" password="password" roles="manager-gui,admin-gui"/>
</tomcat-users>
For the Manager app, type:
sudo nano /opt/tomcat/webapps/manager/META-INF/context.xml
For the Host Manager app, type:
sudo nano /opt/tomcat/webapps/host-manager/META-INF/context.xml
To restart the Tomcat service and view the effects:
sudo systemctl restart tomcat
8. Access the Online Interface
Now that you already have a user, you can access the web management interface in a browser. Once again, you can access the interface by providing your server’s domain name or IP address followed by port 8080 in your browser – http://server_domain_or_IP:8080
Let’s take a look at the Manager App, accessible via the link – http://server_domain_or_IP:8080/manager/html.
Make sure that you entered the account credentials to the tomcat-users.xml file.
We use the Web Application Manager to manage our Java applications. You can Begin, Stop, Reload, Deploy, and Undeploy all apps here. Lastly, it provides data about your server at the bottom of the page.
Now let’s look at the Host Manager, accessible via http://server_domain_or_IP:8080/host-manager/html/
From the Virtual Host Manager page, you can also add new virtual hosts that follow your application form’s guidelines.
Conclusion
Ubuntu supports Tomcat 6 and the latest version Tomcat 9 which includes new features to allow users to work freely on the application.
With this tutorial, your Tomcat installation is functional but entirely unencrypted, so other parties on a web browser can view or change the information or data, passwords, and other sensitive data. The only way to resolve this issue is to encrypt your connections with SSL.
Learn What Else Your Ubuntu Can Do
How to List Packages in Ubuntu
How to Install Git on Ubuntu
How to Setup an FTP Server for Ubuntu
How to Install Node.js in Ubuntu
Install Tomcat on Ubuntu FAQ
In this section, we’ll cover some of the most common questions for configuring Tomcat on Ubuntu.
What Command Do I Use to Install Tomcat on Ubuntu?
To install Tomcat on Ubuntu, use sudo apt install tomcat9 for Tomcat version 9. Adjust the version number based on your requirements.
Can I Install Multiple Versions of Tomcat on Ubuntu?
Yes, you can install multiple Tomcat versions on Ubuntu. Ensure they are configured to run on different ports to avoid conflicts.
What Is the Default Installation Directory for Tomcat on Ubuntu?
The default installation directory for Tomcat on Ubuntu is /var/lib/tomcat9 for Tomcat 9. This path varies with the version.

Edward is a content editor with years of experience in IT writing, marketing, and Linux system administration. His goal is to encourage readers to establish an impactful online presence. He also really loves dogs, guitars, and everything related to space.
