How to Deploy Laravel Project on a Virtual Private Server in 2024
Laravel is an open-source PHP web application framework. Its toolkits, libraries, and features help improve development efficiency since users don’t need to code all functionality from scratch.
This popular framework has a large community of developers, enhancing support and resource availability. However, new users might be unsure how to deploy Laravel due to its various dependencies and commands.
In this tutorial, we will explain how to deploy the framework on an Ubuntu virtual private server (VPS). This Laravel deployment guide will also explore several tips that help simplify the task.

Prerequisite for Deploying Laravel
Before getting started with Laravel, purchase a virtual private server hosting plan. When choosing the best VPS hosting plan and provider for your project, consider these aspects:
- Compatibility. Your VPS must support the chosen operating system, web server, Laravel, the latest version of PHP, and other dependencies to run properly.
- Access. The host server must provide full root access via a secure shell (SSH) connection to enable seamless and secure Laravel deployment.
- Performance. The ideal VPS hosting environment should provide sufficient bandwidth and server resources to ensure the Laravel application performs optimally.
- Additional features. Some web hosting providers have features that help simplify the application deployment process, like a control panel and a one-click installer.
Hostinger’s VPS solutions are compatible with various Linux distributions, software, and frameworks, including Laravel.
Moreover, Hostinger users can set up their server in one click via hPanel using the operating system template. It comes pre-packaged with various software and its dependencies to simplify the deployment process. Check our Laravel VPS hosting page to learn more about the Ubuntu 22.04 with Laravel template for a quick launch.
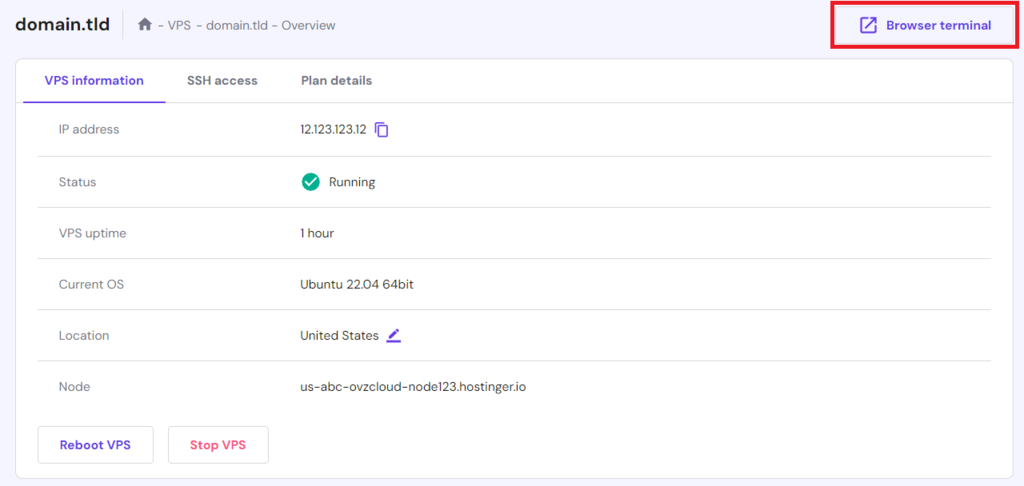
Moreover, all our VPS plans provide full root access to avoid permissions-related issues. Users can also use our built-in Browser terminal to connect to their remote server. It is more convenient than an SSH client since you can run Linux commands directly from your web browser.
Starting at £4.99/month, our VPS solution offers up to 400 GB of NVMe storage, 8 TB of bandwidth, 32 GB of RAM, and 8 vCPU cores, suitable for large-scale enterprise projects. All our plans also come with a 30-day money-back guarantee.

How to Deploy Laravel Project At Hostinger
For Hostinger users, the easiest way to deploy a Laravel project in a VPS is by using an operating system template. This method is accessible via the web browser, so it’s ideal for beginners unfamiliar with the command-line interface.
Important! Back up your VPS before installing an operating system template since it will permanently erase all your server data.
Here are the steps to install Laravel in Hostinger VPS using a template:
- Log in to hPanel and click VPS on the top menu.
- Select the VPS hosting plan on which you want to install Laravel.
- From the sidebar, click Settings → OS & Panel → Operating system.
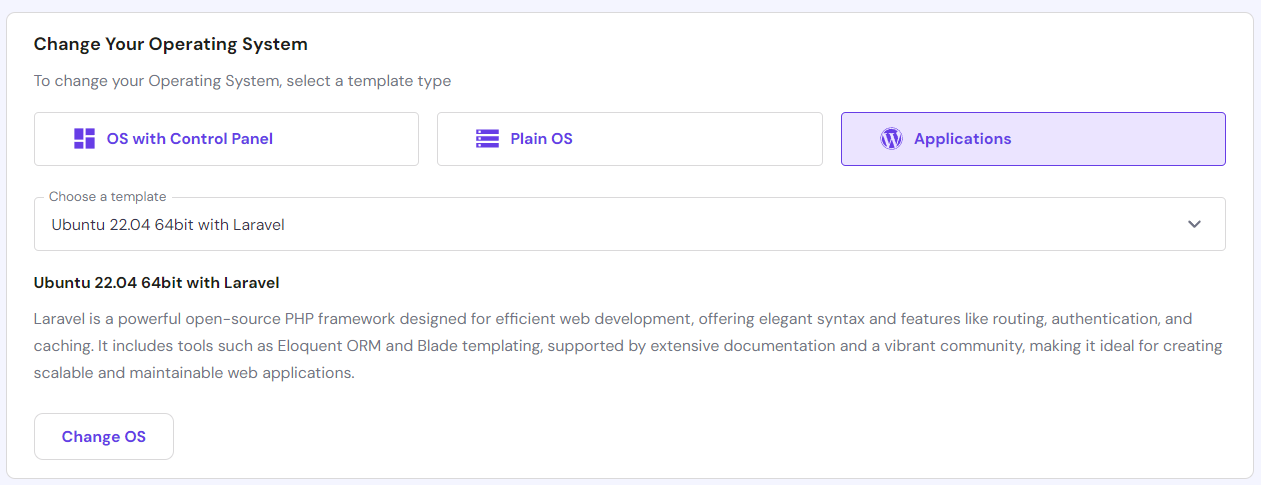
- In the Change Your Operating System section, click Applications.
- Select Ubuntu 22.04 with Laravel from the drop-down menu. Click Change OS to confirm.
- You will be prompted with a confirmation window about data deletion. Check the box after you read the warning and click Confirm.
- Enter a new password for the hosting control panel. Click Confirm to proceed.
That’s it! After the installation process is complete, click the Login URL under Strapi access, and you should see the Laravel welcome screen. The template will also automatically set up CloudPanel for deploying an application.
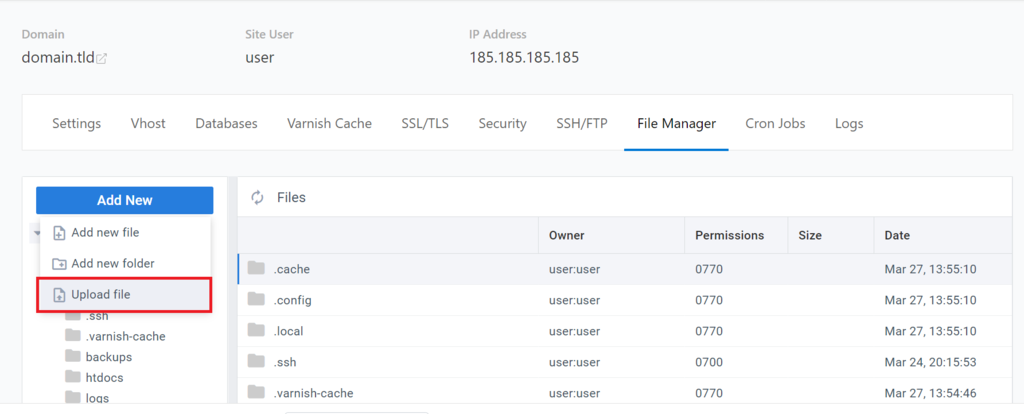
To do so, click the CloudPanel access URL and log in as an administrator. Click your VPS domain → File Manager → Add New → Upload file. Select your project files and click Open.
Since deployment via the control panel can be unreliable, we recommend using other methods like Git. We will discuss it later in the following section.
Note that you can’t choose different software when installing Laravel using the VPS template. If you prefer another operating system or your project requires additional software, consider the manual method.
How to Deploy Laravel Project Manually
In this section, we will explain the steps for manually deploying Laravel on VPS hosting running Ubuntu 22.04. Depending on the Linux distro and version, the commands may differ.
1. Prepare the Server for Laravel
Begin the deployment by installing the dependencies to prepare the hosting environment. You can use an SSH application like PuTTY, Terminal, or Hostinger’s Browser terminal.
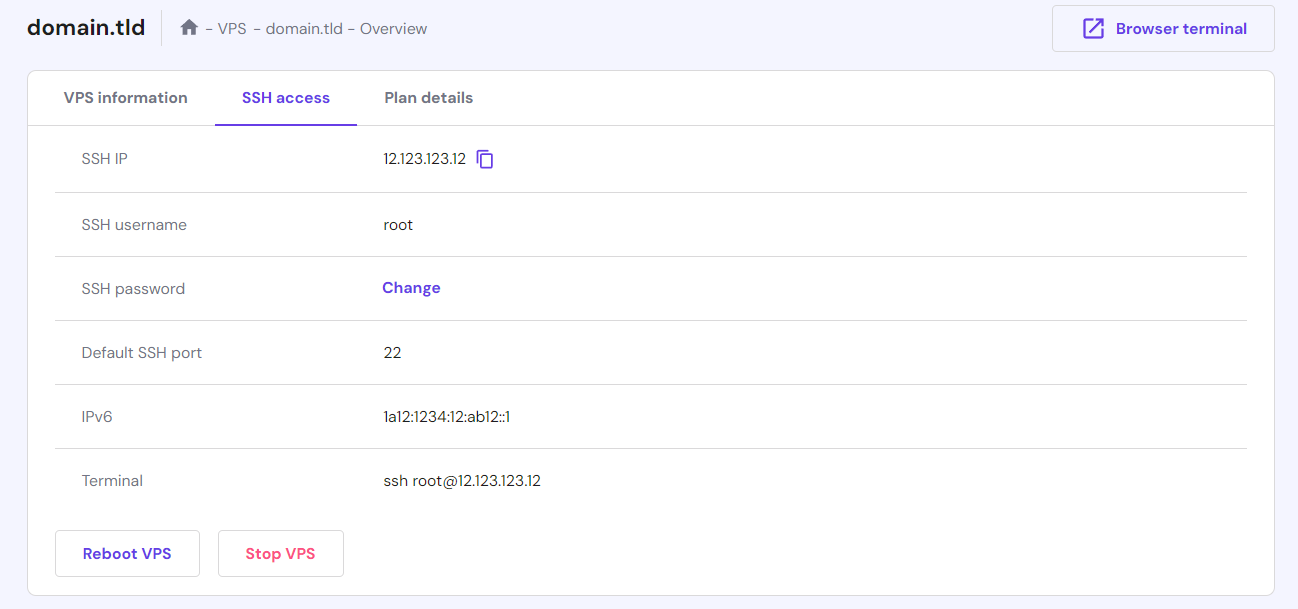
Log in to your server using the root user. On Hostinger VPS, access the credentials by going to hPanel → VPS on the top menu. Then, navigate to your VPS plan and head to Overview → the SSH access tab.
Important! Instead of root, we recommend creating a new account with superuser privilege to avoid accidental destructive command execution.
Laravel requirements include a web server, database, PHP databases, and Composer. You’ll also need other software like Git to push the application files from your local computer to the remote machine. Here are the steps:
- Update your APT package manager repository using this command:
sudo apt update && sudo apt upgrade
- Install the web server. In this tutorial, we’ll use Apache:
sudo apt install -y apache2
- Run this command to set up PHP and its extensions:
sudo apt install -y php php-cli php-fpm php-mysql php-xml php-mbstring
- Configure a database. We’ll install MySQL using the following command:
sudo apt install -y mysql-server
- Install Composer to manage Laravel dependencies using this command:
sudo apt install -y composer
- Enter this command to set up the Git version control system:
sudo apt install -y git
If you don’t want to manually set up the production server, purchase Laravel Forge. Starting at $12.99/month, this platform provides a centralized area for installing and managing all applications required for your project.
2. Deploy the Application
Create a virtual host for your Laravel project by setting up a web server configuration file using the nano text editor. For Apache, run the following command:
sudo nano /etc/apache2/sites-available/laravel.conf
Within the file, write the following configuration. Make sure to replace the directory placeholders with the actual path and thedomain.com with your server IP address:
<VirtualHost *:80>
   ServerName thedomain.com
ServerAdmin webmaster@thedomain.com
   DocumentRoot /var/www/html/test-laravel/public
   <Directory /var/www/html/test-laravel/public>
      AllowOverride All
   </Directory>
   ErrorLog ${APACHE_LOG_DIR}/error.log
   CustomLog ${APACHE_LOG_DIR}/access.log combined
</VirtualHost>
Important! The configuration file content will look different if you use another web server like NGINX.
Deploy Laravel application project code from your Git repository by running these commands in a series. Replace the URL with the actual link:
cd /var/www/html
sudo git clone https://github.com/your_username/test-laravel.git
If you haven’t pushed your Laravel project files to a repository, read our Git tutorial to learn more about how to do so.
To deploy the project files, you can use methods like the rsync utility or a secure file transfer protocol (SFTP) application. However, we recommend version control in Laravel deployment for convenience and security.
Navigate to your project directory path and run composer install to configure the dependencies:
cd test-laravel
sudo composer install
If Terminal returns error messages, try running the composer update command. Also, add the –ignore-platform-req=ext-curl option to see if the issue resolves.
3. Configure the .env File
When you create a Laravel application, Composer will generate a .env.example file template. It stores environment-specific configurations, determining various variables for your applications, like database information.
To set up a .env file for your Laravel project, copy the template below and open it using nano:
sudo cp .env.example .env
sudo nano .env
This file’s configuration uses the KEY=VALUE pair syntax. For example, the following entry determines the Laravel database user password:
DB_PASSWORD=your_password
To change the configuration, delete the value and replace it with a new one. Press Ctrl + X, Y, and Enter to save the changes.
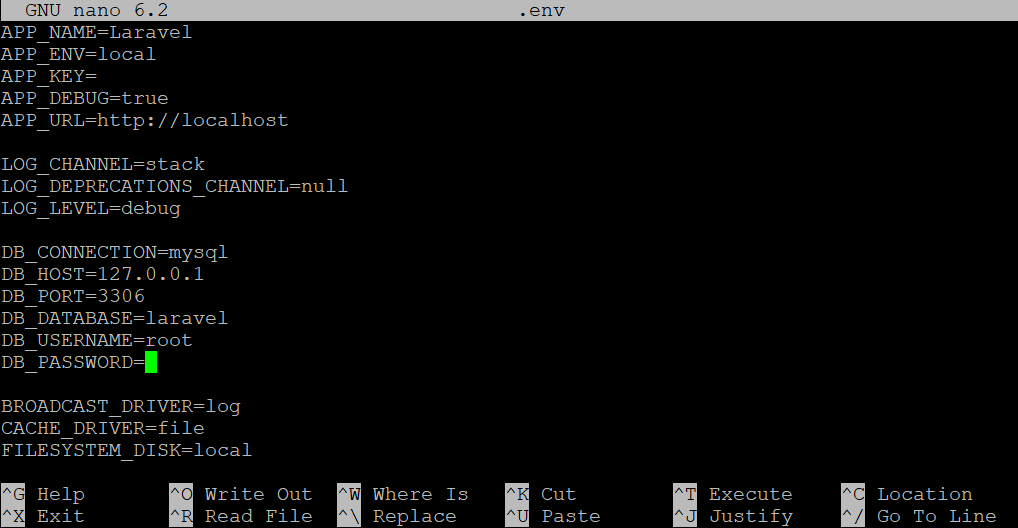
By default, Laravel will set the DB_USERNAME as root and leave the DB_PASSWORD empty. However, it might cause an error when you run PHP artisan, the framework command-line utility, for database migration.
To resolve it, change the default root password and update the DB_PASSWORD value accordingly. Also, we recommend creating a non-default database and users specific to your current project for easier management.
Pro Tip
Check out our tutorial to learn more about how to configure your MySQL user, password, and permissions on Ubuntu.
4. Run the Application
To start your Laravel application, make the project folder executable by changing the permissions and ownership:
sudo chown -R www-data /var/www/html/test-laravel
sudo chmod -R 755 /var/www/html/test-laravel/storage
Run PHP artisan to generate the application key and initiate the database migration. Here are the commands:
sudo php artisan key:generate
sudo php artisan migrate
Whenever you modify the database schema, update the migration files to maintain consistent configuration for your app. Check out Laravel’s migration guide to learn more about it.
Disable the virtual host’s default configuration file in Apache using the following command:
sudo a2dissite 000-default.conf
Enable the new virtual host and the rewrite module using these commands:
sudo a2ensite laravel.conf
sudo a2enmod rewrite
Restart Apache using the systemctl command:
sudo systemctl restart apache2
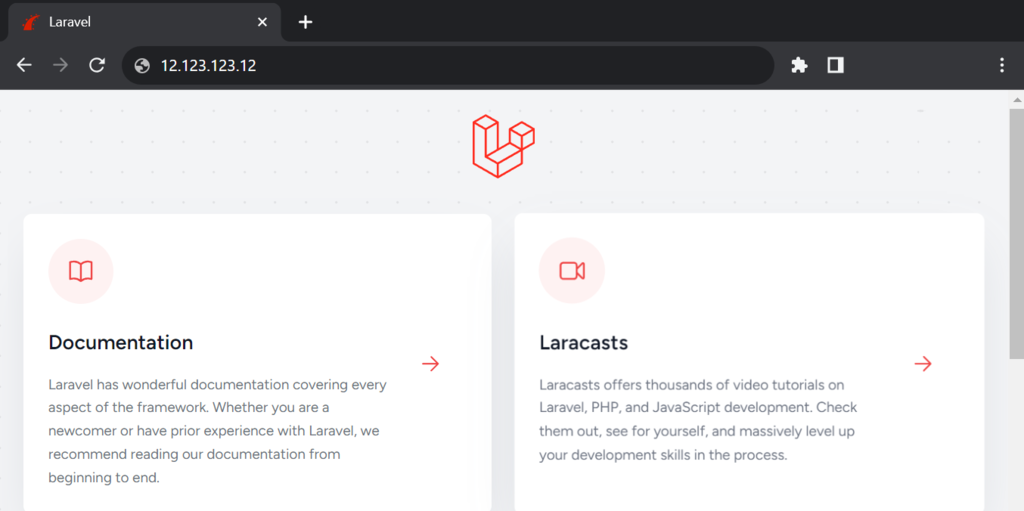
Once the deployment process is complete, enter your VPS IP address or domain name into a web browser to check whether the application works correctly. If the files are empty, you should see the Laravel welcome page.
Laravel Deployment Tips and Tricks
In this section, we will discuss several Laravel deployment best practices to help streamline the process.
Use Caching Configuration in Laravel
The Laravel framework lets you store frequently accessed data as cache. It reduces the time required to fetch the information and offloads database queries, improving your web application performance.
It also provides various caching backends and drivers. Users can choose one that best suits their needs and configure it easily through the .env file’s CACHE_DRIVER key.
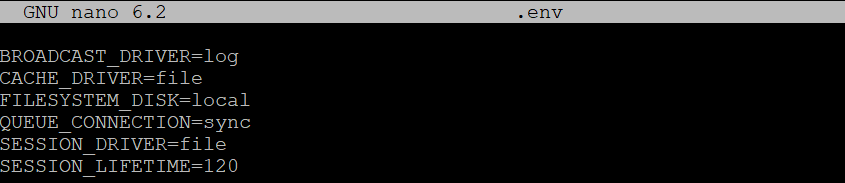
If you don’t specify the cache driver, Laravel will use file by default. Alternatively, you can set it to array, database, redis, or memcached.
To enable cache, add the method to your application’s codebase. For example, write Cache::put() to store data for a specified duration:
Cache::put(‘key’, ‘value’, $minutes);
Meanwhile, use the Cache:rememberForever() method to store the cache indefinitely:
Cache::rememberForever( ‘key’, function);
This framework provides many caching methods for different purposes, like retrieving, removing, or incrementing the stored data. To learn more about them, check out Laravel’s caching documentation.
To manage the cache, you can run the PHP artisan commands in your project’s working directory. For example, enter the following to remove the stored data:
php artisan cache:clear
Use Automatic Laravel Deployment Tools
Automating Laravel deployment helps save time and effort since without it, the process involves many steps. There are various tools and platforms for this task.
You can use continuous integration/continuous deployment (CI/CD) services like GitHub Actions or software like Jenkins. They let you automate a custom Laravel deployment pipeline.
To set up automation in GitHub Actions, create a .yml file in your project directory. Define the workflow and its trigger event, like pushing the changes to the main branch. Then, write the tasks, steps, and environment variables. Read the GitHub Actions quick start guide to learn more about it.
For example, you can make it so that whenever a user pushes new code changes to the main branch, the .yml file will automatically run the PHP artisan command to generate the application key and restart your web server.
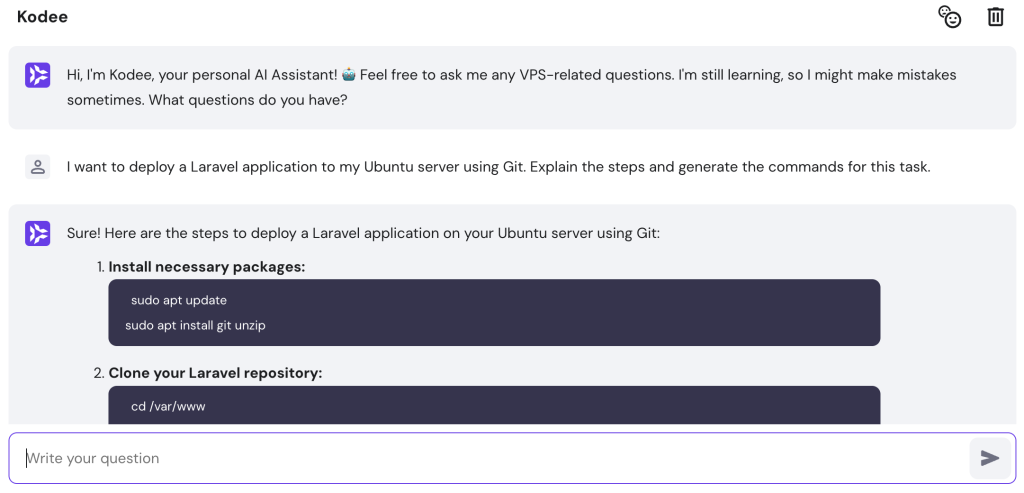
Use Hostinger’s Kodee for Easier Deployment
Hostinger provides Kodee – a free VPS AI Assistant that helps improve your deployment efficiency. You can learn how to deploy a Laravel project on Hostinger and quickly generate instructions and commands for any task using AI prompts for VPS management.
For example, tell Kodee, “I want to deploy a Laravel application to my Ubuntu server using Git. Explain the steps and generate the commands for this task.” It will return a comprehensive response, and you can follow the guide and copy-paste the generated commands.
You can also use Kodee to help troubleshoot errors during the Laravel deployment process. For example, “I am deploying a Laravel application on an Ubuntu server. However, I found an error when running the PHP artisan command to migrate the database. Explain the possible causes and solutions.”
To access this feature, open your VPS configuration page in hPanel and select Kodee from the sidebar.
Important! As with any AI tool, we recommend you to always test the generated steps and commands in a development environment first to avoid accidents that may harm your live server.
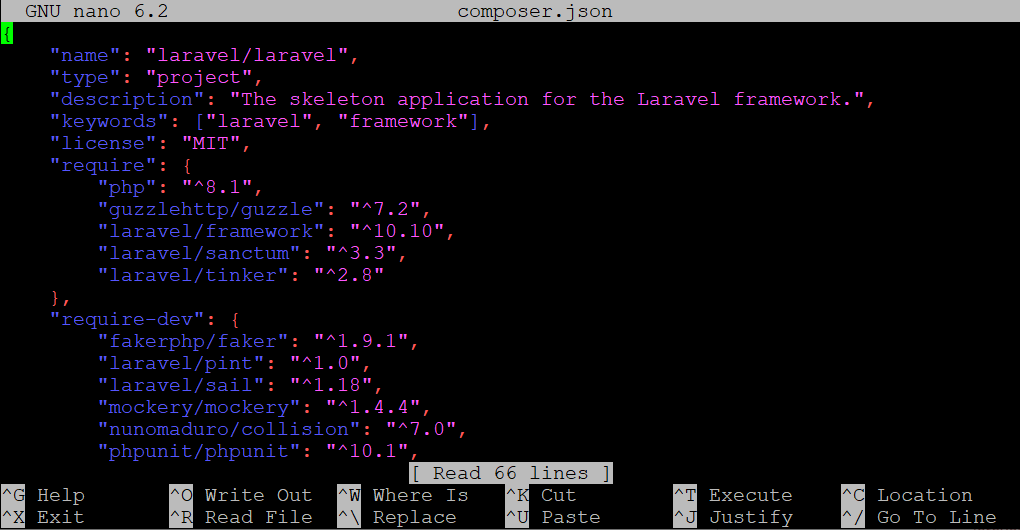
Utilize Proper Dependency Management
Composer lets developers define their app dependencies in the composer.json file. In addition to simplifying the installation process, it also improves environment stability and version control efficiency.
Run the composer update command to fetch all dependency patches specified in the file. However, ensure to review the new versions before doing so to avoid incompatibility issues or destructive updates.
To access the file, navigate to your Laravel project root directory. Usually, it is located within the var/www/html/test-laravel path.
The composer.json file only applies to a specific environment. To ensure a clean and efficient project structure, maintain detailed documentation of each application or component’s dependency configuration.
Regularly updating project dependencies ensures you receive the latest security patches and bug fixes. It also helps avoid incompatibility issues and version conflicts that might harm your application functionality.
Optimize Laravel Performance
Laravel performance optimization helps improve application responsiveness and scalability. If you run consumer-facing services, it can also help boost the user experience and brand perception.
There are several methods to optimize Laravel performance in an Ubuntu VPS. Here are some of them:
- Enable caching. Laravel provides caching backends and devices to store frequently requested data in temporary storage. It helps reduce server load and database queries.
- Set up a content delivery network (CDN). A CDN caches static content in multiple servers worldwide. It helps ensure your web application performs optimally regardless of the visitor’s location.
- Utilize queue workers. Queue workers are background processes handling resource-intensive tasks. They help offload these processes from the main application flow to improve performance.
- Apply eager loading. Eager loading retrieves data related to the requested one on a single query. It helps reduce load since the database doesn’t need to send the information individually.
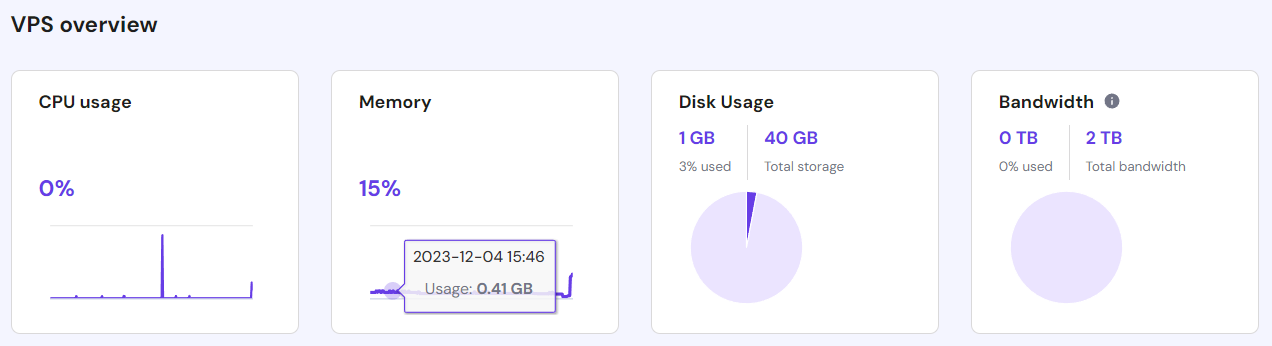
In addition, always track your web application performance to ensure it runs optimally. Doing so lets you quickly catch potential issues impacting uptime or usability. Hostinger offers a built-in server resource monitoring feature accessible via hPanel.
Suggested Reading
Looking to configure Laravel on your VPS? Check out our tutorial about installing Laravel on Ubuntu 18.04 using Apache and PHP to learn more about the steps.
Conclusion
Laravel is an open-source PHP web application framework that helps improve development efficiency. To deploy it in Hostinger VPS, navigate to the Operating System menu in hPanel and install the Ubuntu 22.04 with Laravel template. Then, upload your project via CloudPanel’s file manager.
Alternatively, users looking for more flexibility can deploy Laravel manually using commands. Here are the steps:
- Prepare the new server. Install Composer, Apache web server, PHP, and other software on the production environment. Alternatively, use Laravel Forge to manage them on a single platform.
- Deploy the application. Set up a virtual host by creating an Apache configuration file. Push your app code from a Git repository to the live server.
- Configure the .env file. Copy the .env.example template into your application folder and change the .env file’s key-value pair to tweak its settings.
- Run the Laravel application. Change the project folder’s permissions and ownership. Run the composer install and PHP artisan commands, then disable Apache’s default virtual host.
To improve the Laravel application deployment efficiency, use Hostinger’s Kodee, automation tools, and the Composer dependency manager. Also, set up a CDN, enable cache, and optimize database queries to improve your application performance.
How to Deploy Laravel FAQ
In this section, we will answer several common questions about deploying a Laravel project.
What Do I Need to Deploy a Laravel Project?
To deploy Laravel apps, you need a server running a compatible operating system like Ubuntu. You also need several dependencies, like a web server, PHP, PHP extensions, Composer, Git, and a database.
It’s also possible to use NGINX or Apache. Meanwhile, popular databases for Laravel include MySQL and MongoDB.
Can I Deploy Multiple Laravel Applications on the Same Server?
Yes, you can deploy multiple applications in a Laravel server with a dedicated directory, dependencies, and configuration environments.
To do so, create separate folders for the Laravel applications within the /var/www/html path. Set up dedicated virtual hosts for each project and copy the .env file to every directory.
Can I Scale My Laravel Application?
Yes. You can apply common scaling methods like configuring load balancers, upgrading server resources, and setting up caching mechanisms like Redis or Memcached.
In addition, this framework has a built-in queue system that offloads resource-demanding tasks from the main flow. It helps improve performance for scaling Laravel applications.

Aris is a Content Writer specializing in Linux and WordPress development. He has a passion for networking, front-end web development, and server administration. By combining his IT and writing experience, Aris creates content that helps people easily understand complex technical topics to start their online journey. Follow him on LinkedIn.