How to install OpenCart for your online business: Using the Hostinger VPS template and manually

The open-source eCommerce platform OpenCart provides pre-built tools and features to create an online store more easily. It’s an excellent solution if you want to sell products online without building the store from scratch.
Being open-source also means Opencart is flexible. For example, you can install it on various hosting environments, including a Linux virtual private server (VPS), which is suitable for a large-scale online store.
In this tutorial, we’ll explain how to install OpenCart on a VPS using two methods. The Hostinger VPS template is simpler and more beginner-friendly since it uses a graphical interface. Meanwhile, the manual installation suits users who prefer using commands for flexibility.
Prerequisites for installing OpenCart
Before installing OpenCart, purchase a VPS hosting plan that provides ample resources based on the scale of your online store. Make sure your web host offers upgradable plans to accommodate your growing eCommerce needs.
OpenCart is lightweight and can run on a server with minimal resources. However, as your store features more products and handles more transactions, it will consume more computing power.
If you are just starting a small online shop, Hostinger’s OpenCart hosting KVM 1 can be an excellent option. Featuring a single-core CPU, 4 GB of RAM, and 50 GB of storage, it should be sufficient for a store with dozens of products and daily transactions.
Once your eCommerce site grows, you can upgrade to up to KVM 8, which has 8 vCPU cores, 32 GB of RAM, and 400 GB of storage. Upgrading Hostinger VPS only takes a few minutes and our system will automatically migrate your files for a seamless process.
In addition to powerful hardware suitable for online stores of different sizes, Hostinger OpenCart hosting’s built-in features help improve your eCommerce administration efficiency.
The free automatic weekly backups ensure your store data is safe with minimal effort, while our built-in malware scanner helps safeguard your server from malicious software. Also, our Kodee AI assistant helps write commands and guidance for managing your eCommerce website based on simple prompts.
Our global data center also lets you host your OpenCart website closest to your buyer, ensuring a responsive shopping experience.

Install OpenCart using the Hostinger VPS template
Hostinger VPS users can easily install OpenCart in a few clicks using the template. In addition to making the process more efficient and simple, it helps minimize errors since you won’t have to run any commands.
Warning! Installing a new VPS template will wipe all your server data. If you have used your VPS, back up important files before proceeding. For new users, you don’t need to do so.
If you purchased the OpenCart VPS hosting plan, you can set up this platform by choosing the Ubuntu 24.04 with OpenCart template during the onboarding process. Once finished, you will be set.
Meanwhile, follow this installation process if you purchased the general VPS hosting plan or previously installed another template:
- Open hPanel → sidebar → VPS. Click Manage on your VPS.
- Navigate to the side menu → OS & Panel → Operating System.
- Go to the Application tab and click Ubuntu 24.04 with OpenCart. You can also easily find it using the search menu.
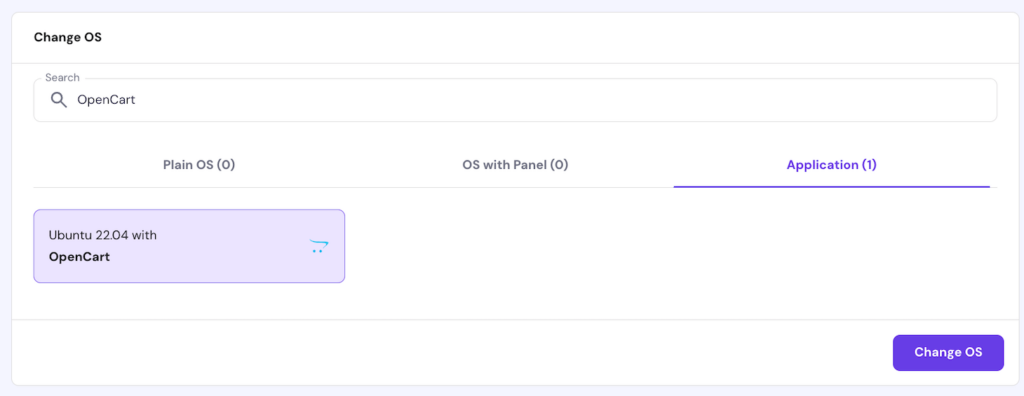
- Click Change OS.
- Check the box to acknowledge the data deletion. Click Next.
- Enter a password for your eCommerce store control panel. Hit Confirm.
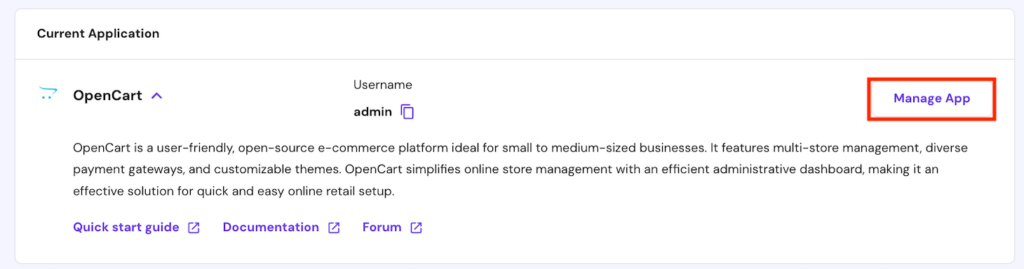
Wait until the OpenCart template installation process is complete, which should take about 10 minutes. Once finished, click Manage App on the top menu to access the platform’s dashboard.
If the panel is inaccessible, it might be due to the hostname not resolving to the IP address properly. To fix it, open your local computer’s /etc/hosts file and add the following line:
185.185.185.185 your.vps.hostname
Remember to change the IP address and server hostname with the actual value.
How to install OpenCart manually
If you want to use other operating systems or need more flexibility in configuring OpenCart, you can install it manually using commands. Here are the steps to do so.
1. Connect to your VPS via SSH
Before running installation commands on your VPS, connect to the server using the PuTTY SSH client or terminal. If you use the latter, simply run the following command:
ssh root@185.185.185.185
Then, enter your root password. Hostinger VPS customers can find their server’s IP address and root login credentials by going to the VPS overview menu’s SSH access tab.
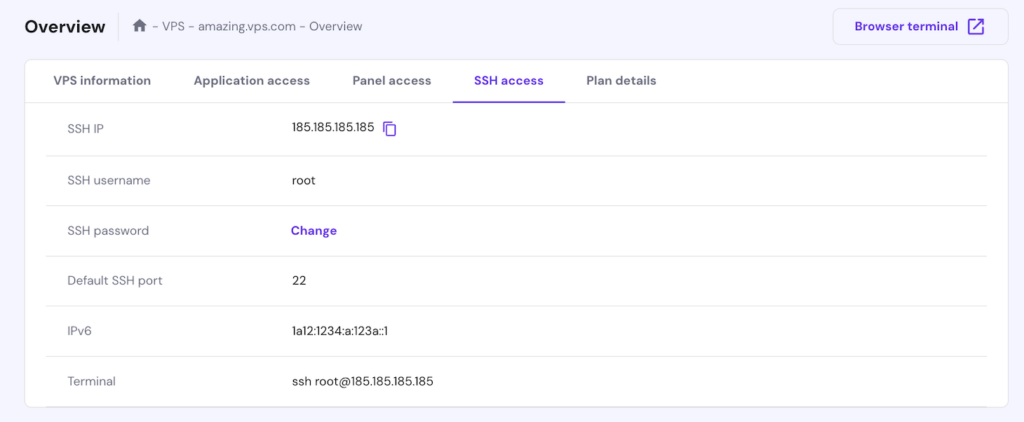
Alternatively, Hostinger users can access their VPS command-line interface (CLI) via their web browser using the Browser terminal. Simply click the button on the top right of your VPS overview menu, and you will log in automatically.
2. Update your VPS
Updating your VPS repositories ensures you have the latest version of all software packages. Note that the commands differ depending on your Linux distribution.
For example, run the following command to update Ubuntu and other Debian-based operating systems’ repositories:
sudo apt update && apt upgrade
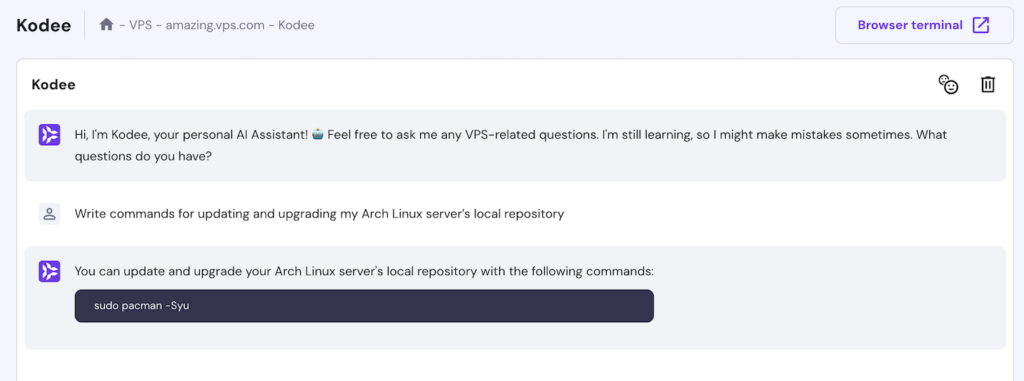
If you use another distribution or encounter difficulties when running the commands, we recommend asking the Kodee AI assistant for help. You can access this tool by going to hPanel’s VPS management menu and clicking the Kodee AI assistant button on the left sidebar.
For example, if you use Arch Linux, ask Kodee, “Write commands for updating and upgrading my Arch Linux server’s local repository.”
3. Install dependencies
OpenCart requires three dependencies – PHP, a web server, and a database. In this tutorial, we will install Apache and MariaDB, but you can use another web server or database.
Set up PHP
To install PHP and other complementary modules, run the following:
sudo apt install php php-mysqli php-mbstring php-xml php-gd php-curl php-zip php-json
If your command line warns you about missing packages, rerun the command above with the –fix-missing option. Confirm that PHP is properly installed by running:
php -v
If the setup process is successful, your shell should output the installed PHP version.

Configure Apache
A web server like Apache enables your OpenCart store to receive and process user requests. Execute the command below to install it:
sudo apt install apache2
Once installed, start and enable the Apache web server on your VPS by running:
sudo systemctl enable apache2
sudo systemctl start apache2
Verify the web server status, which should appear as active (running) and enabled:
sudo systemctl status apache2

Configure MariaDB
OpenCart uses a database like MariaDB to store various data, such as users’ order details and item information. To install it, run:
sudo apt install mariadb-server
Then, execute this command to start the MariaDB security configuration. To learn more about the settings, check the mariadb-secure-installation documentation.
sudo mariadb-secure-installation
After setting up MariaDB, create a new database for your OpenCart online store. Here are the steps:
- Switch to the database root user using the command below. Use the password you set during the secure installation process.
sudo mysql -u root -p
- Create a database for OpenCart. Replace opencart_db with your preferred database name:
CREATE DATABASE opencart_db;
- Set up a user for the new database. Replace username and password with your desired value:
CREATE USER 'username'@'localhost' IDENTIFIED BY 'password';
- Grant the user privileges over the OpenCart database:
GRANT ALL PRIVILEGES ON opencart_db.* TO 'username'@'localhost';
- Flush the privileges to apply the changes:
FLUSH PRIVILEGES;
- Quit the MariaDB shell with the following:
EXIT;
4. Download and extract OpenCart
After installing the required dependencies, it’s time to download and prepare the OpenCart files. Follow these steps:
- Visit OpenCart’s official repository on GitHub. Hit the Code button, right-click Download ZIP, and copy the link address.
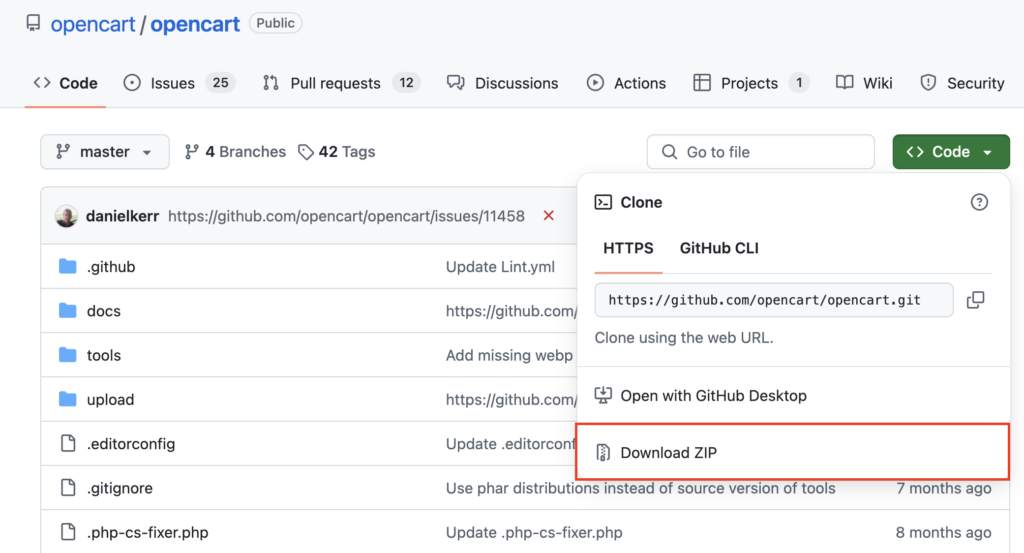
- In your terminal, use wget with the copied link to download OpenCart to your VPS. Here’s an example command:
wget https://github.com/opencart/opencart/archive/refs/heads/master.zip
- If you haven’t installed the unzip utility, do so by running:
sudo apt install unzip
- Extract the downloaded OpenCart ZIP file to your web server’s root directory:
sudo unzip master.zip -d /var/www/html/opencart
- Copy the configuration files from the upload folder to their expected locations:
sudo cp /var/www/html/opencart/upload/config-dist.php /var/www/html/opencart/upload/config.php
sudo cp /var/www/html/opencart/upload/admin/config-dist.php /var/www/html/opencart/upload/admin/config.php
- Set the correct permissions and ownership for the installation directory:
sudo chown -R www-data:www-data /var/www/html/opencart
sudo chmod -R 755 /var/www/html/opencart
5. Set up an Apache virtual host
Setting up an Apache virtual host file is important if you want to host multiple websites on your VPS or have a specific domain pointing to your OpenCart installation. Here are the instructions:
- Create a configuration file for OpenCart in Apache’s sites-available directory to route your domain correctly:
sudo nano /etc/apache2/sites-available/opencart.conf
- In the file, add the following configuration. Replace yourdomain.com with your VPS’ IP address or domain name:
<VirtualHost *:80>
    ServerAdmin admin@yourdomain.com
    DocumentRoot /var/www/html/opencart/upload/
    ServerName yourdomain.com
    ServerAlias www.yourdomain.com

    <Directory /var/www/html/opencart/upload/>
        Options FollowSymLinks
        AllowOverride All
        Order allow,deny
        Allow from all
    </Directory>

    ErrorLog /var/log/apache2/yourdomain.com-error_log
    CustomLog /var/log/apache2/yourdomain.com-access_log common
</VirtualHost>
- Save the file and exit the nano text editor by pressing Ctrl + X → Y → Enter.
- Disable the default Apache configuration and enable the new one:
sudo a2dissite 000-default.conf
sudo a2ensite opencart.conf
- Activate the rewrite module for SEO-friendly URLs in OpenCart:
sudo a2enmod rewrite
- Restart Apache to apply the changes:
sudo systemctl restart apache2
6. Complete the OpenCart installation
Now, finish setting up your store through OpenCart’s installation wizard with these steps:
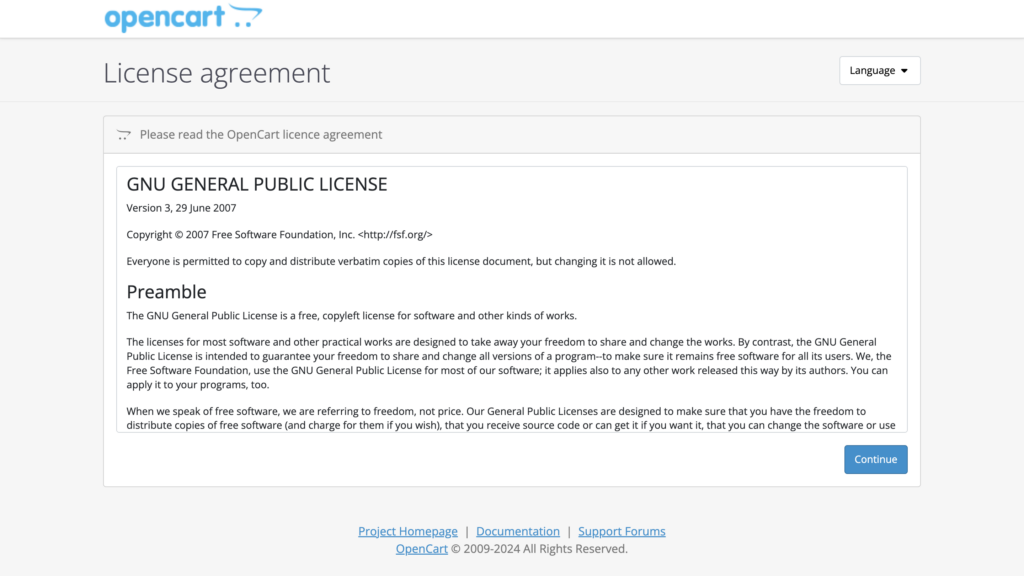
- Open a new browser tab and enter your VPS’ IP or domain. This will bring up the OpenCart installation wizard. Accept the license agreement by clicking Continue.
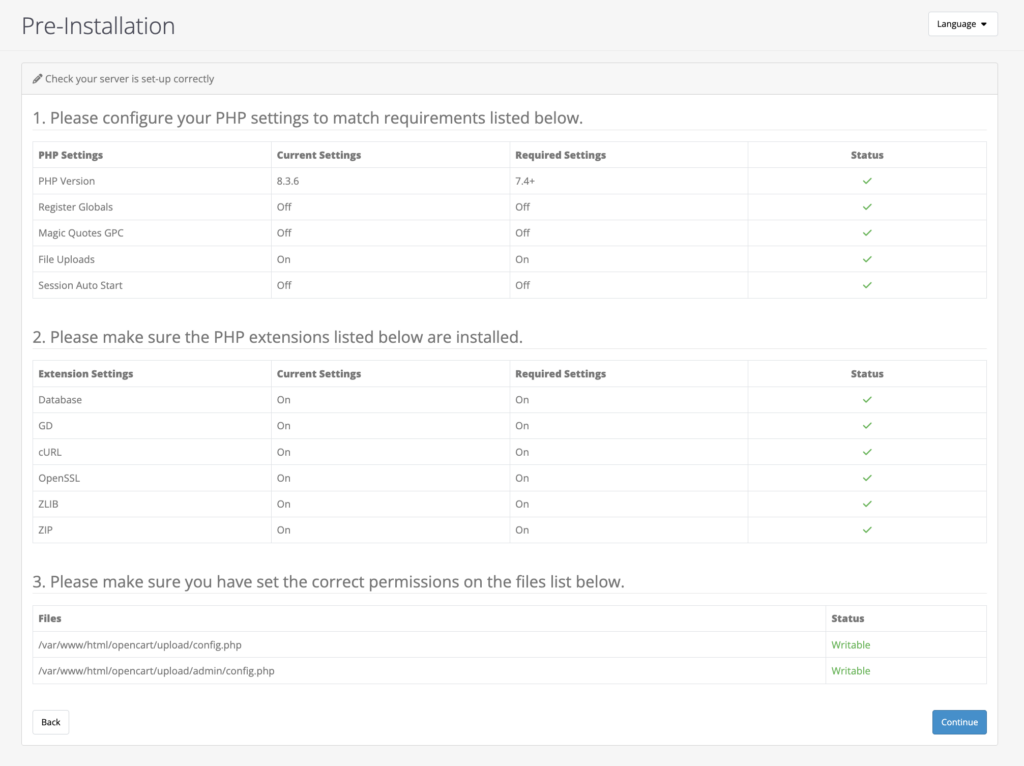
- The wizard will verify if your VPS meets OpenCart’s technical requirements. Resolve any issues listed before proceeding. Otherwise, hit Continue.
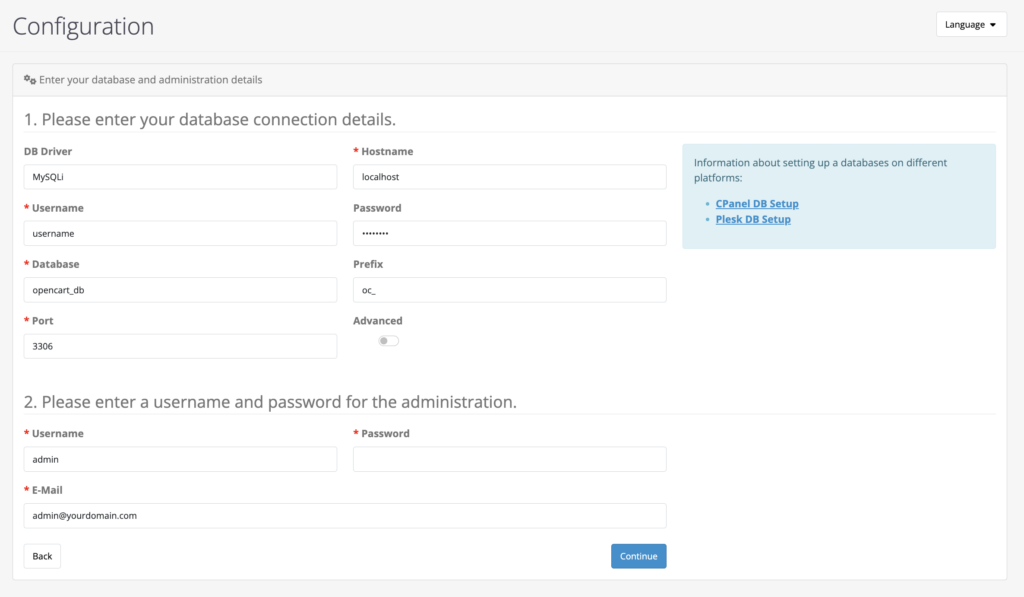
- Fill in your database information, including the hostname, database name, username, and password. On the same page, set up your administration details.
- You should see the Installation complete message. Next, access your eCommerce store’s admin panel using the credentials you set up.
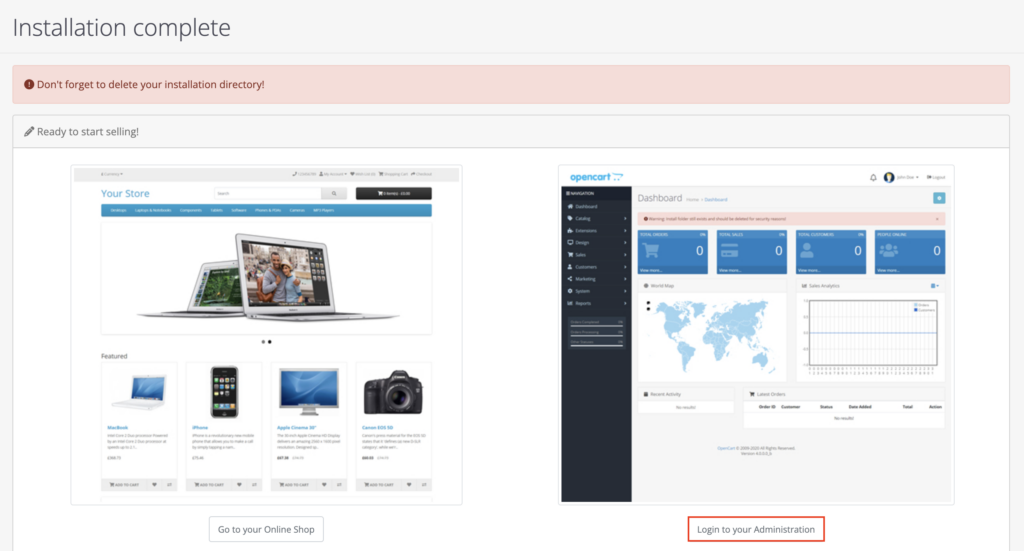
- Last but not least, delete the installation directory for security purposes:
sudo rm -rf /var/www/html/install
Conclusion
In this article, you’ve learned how to install OpenCart on a Linux VPS using Hostinger’s preconfigured template or manually. The template simplifies the process to just a few clicks, while manual setup offers greater flexibility, such as when using a different OS.
Regardless of the chosen method, you now have a flexible eCommerce platform capable of handling high traffic and numerous transactions. After completing the installation, explore OpenCart’s features to add products, customize your store’s design, and set up payment methods.
If you have further questions about OpenCart, feel free to use the comment box below.
How to install OpenCart FAQ
What is OpenCart?
OpenCart is a free, open-source eCommerce platform for creating and managing online stores without building everything from scratch. It’s flexible, customizable, and suitable for businesses of all sizes.
Which installation method is best for beginners?
For beginners, we recommend using Hostinger’s OpenCart VPS template. This quick installation method lets you set up your store easily, avoiding command-line errors and requiring no technical expertise.
Do I need an SSL certificate for my OpenCart store?
Yes, an SSL certificate is necessary to secure customer data, encrypt transactions, and build trust with shoppers. Check our guide to learn how to install a free SSL certificate on your VPS.

Aris is a Content Writer specializing in Linux and WordPress development. He has a passion for networking, front-end web development, and server administration. By combining his IT and writing experience, Aris creates content that helps people easily understand complex technical topics to start their online journey. Follow him on LinkedIn.

Ariffud is a Technical Content Writer with an educational background in Informatics. He has extensive expertise in Linux and VPS, authoring over 200 articles on server management and web development. Follow him on LinkedIn.

Comments
September 17 2020
unable to configure seo url in opencart htassess is not working
November 18 2020
Hey Siba. Please check Opencart's official info here.