WordPress Export Posts: Best Practices for Exporting Posts With Images

Initially designed as a CMS for blogs, WordPress is now used to create different types of websites. But if you’ve built a website on this platform, you may have used its blogging capabilities too. Whether it’s because your domain name changed or for any other reason, you might want to export your blog posts out of the site.
Fortunately, the process is simple enough that WordPress users with no technical knowledge can do it.
However, the best method to accomplish this varies depending on the WordPress posts you want to export. With this in mind, we will cover three ways of exporting WordPress blog posts.
Let’s start by discussing when it might be worth exporting from WordPress in the first place.
Download all in one WordPress cheat sheet
Important! The following methods aren’t ideal for migrating hosting companies as they don’t export your website settings.
Method 1: Exporting All Posts Using the Export Tool
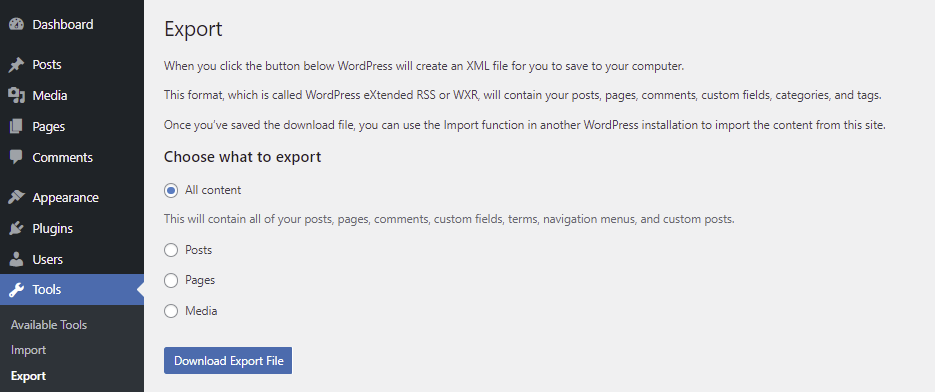
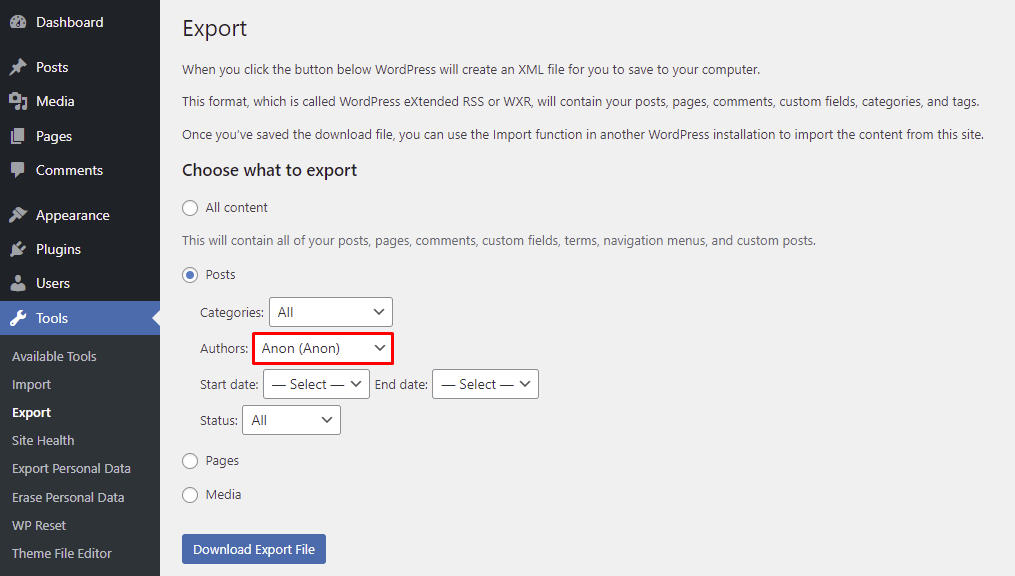
WordPress has a built-in export tool that lets you export content, including posts. It’s accessible via Tools → Export from your WordPress dashboard.
This tool can download posts, pages, or media files from your WordPress site. Choosing to export all content will include comments, navigation menus, terms, custom fields, and custom posts next to posts and pages in the export file.
After choosing which content to export, click on the Download Export File button. You can import the exported XML file into another WordPress site using the built-in import tool.
Important! Since XML is a text-based format, your export file won’t include media files. Even if you choose the Media option, it will only export an XML file containing links to your media items.
Exporting Posts With Images
The method above works effectively only for exporting WordPress posts. To retrieve your posts’ image files, you also need to download the WP-Content/Uploads folder.
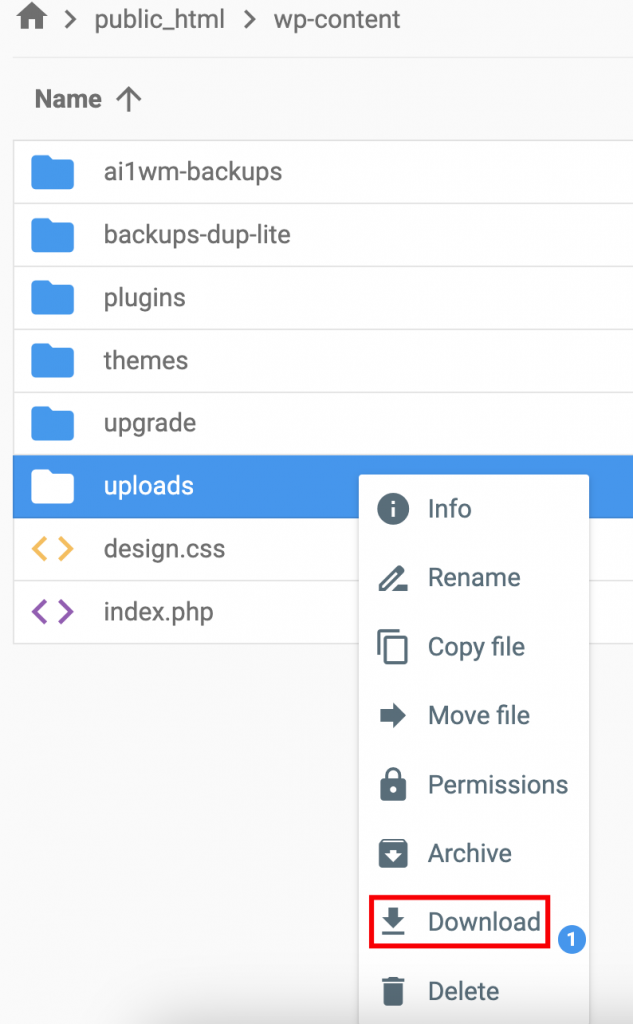
You can access your website’s folder using the File Manager provided by your WordPress host provider or an FTP account. We will show you how to download the WP-Content/Uploads folder via Hostinger’s hPanel:
- Go to Files → File Manager from your hPanel dashboard.
- Open your root directory (public_html) and enter the wp-content directory.
- Right-click the uploads folder and select Download.
- Choose the format you want to download, we recommend sticking with ZIP.
Important! Don’t be alarmed if the compressed folder contains the same images in different sizes. Whenever you upload an image to the media library, WordPress will duplicate it in various sizes for different purposes, such as thumbnails and featured images.
Method 2: Exporting Specific Blog Posts From Various Categories
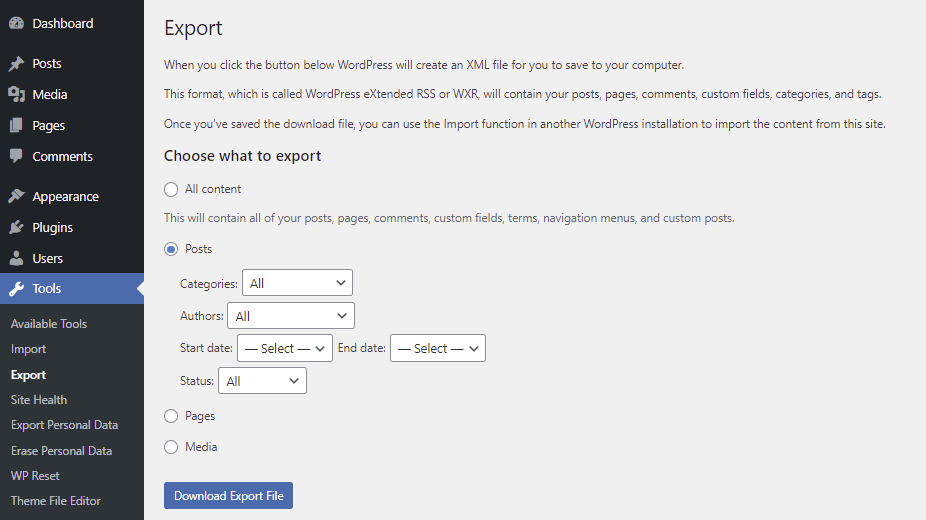
When exporting posts using the WordPress export feature, you can narrow down the blog posts based on their category, date range, author, and status.
We can use this filtering feature, particularly the Author constraint, to export specific blog posts from various categories. Here’s how to do it:
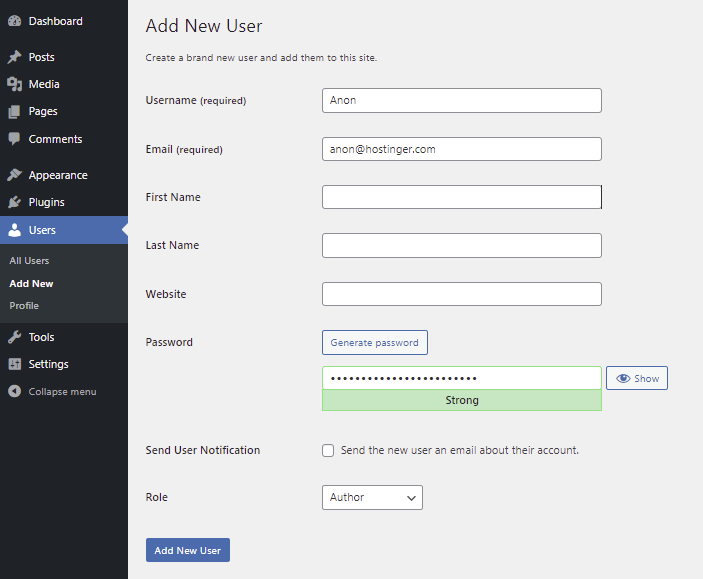
- Create a dummy user. Go to Users → Add New from your WordPress dashboard.
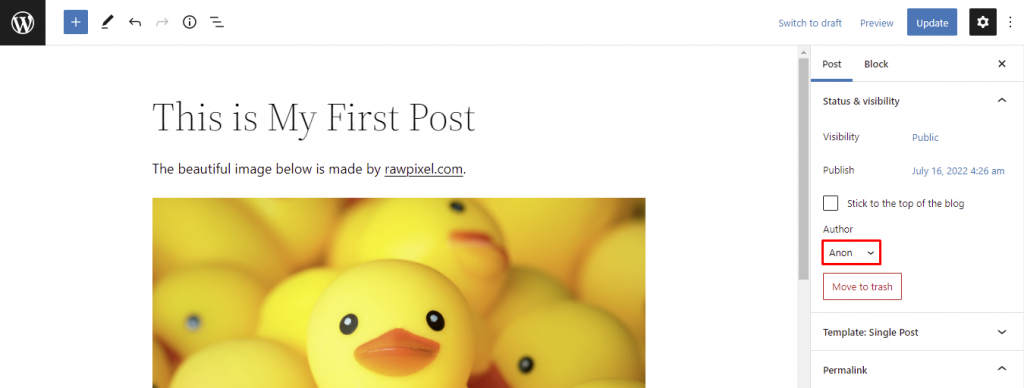
- Fill in the required fields and assign the role of Author. In this example, we’re naming the new user as “Anon.” Click Add New User.
- Navigate to Posts → All Posts and pick one blog post you want to export. Change the author to the dummy one you created earlier. Do this step to other chosen blog posts.
- Go to Tools → Export and pick Posts. Set your dummy account as the Author constraint, then click Download Export File.
Method 3: Exporting WordPress Posts Using WPSyncSheets Plugin
If you want to export your posts as a backup and free yourself from the hassle of doing it regularly, you can use the WPSyncSheets plugin.
This plugin allows you to export your posts and pages into a Google Spreadsheet and synchronize it regularly. It also works on importing custom post types, featured images, and post metadata.
Here’s how you can use the WPSyncSheets plugin to export your posts and pages:
- Install the WPSyncSheets plugin. You will need to purchase a license from their website.
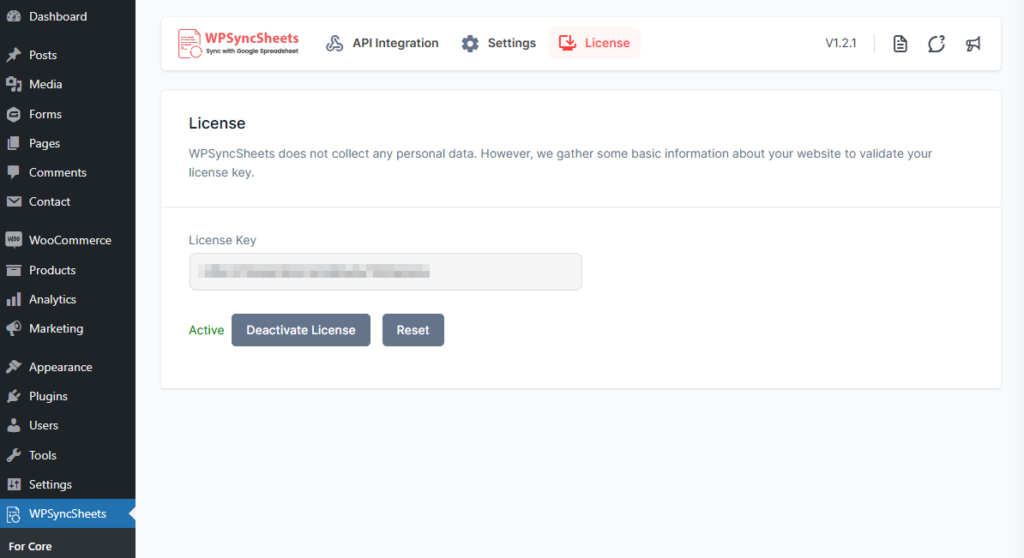
- Open the WPSyncSheets → For Core → License tab to insert the license key.
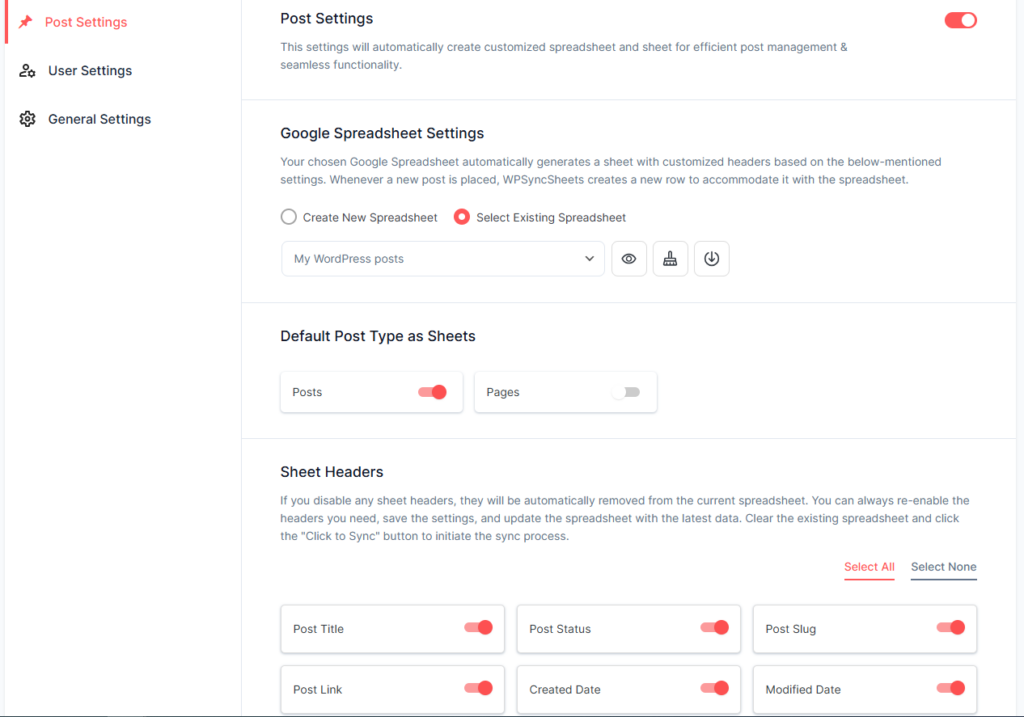
- Open the WPSyncSheets → For Core → Settings tab to configure the settings
- On the Post Settings panel, you can create or select the Google Spreadsheet as the exporting destination. You can also select the post type and the sheet headers you want to export.
- On the User Settings panel, you can find the Schedule Auto Sync section which lets you set a specific time interval to sync the data.
Once you have the plugin configured, you can use the spreadsheet file as a backup. This plugin is also capable of importing posts from the spreadsheet, which is handy if you want to upload the posts on another site.
Method 4: Exporting WordPress Posts With Images to PDFs
If you want to export WordPress posts with images in a more user-friendly format like PDF and available offline for other readers, you need to use a WordPress export post plugin.
This method caters to bloggers who want to repurpose their WordPress website content for newsletters. All the image files will be exported along with the text-based content, so you don’t have to worry about downloading them separately.
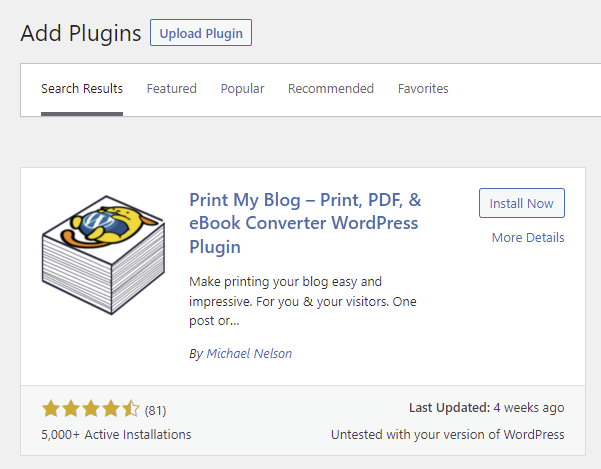
Here’s how to export a WordPress blog post into a PDF file using Print My Blog, an excellent export plugin that supports the PDF format:
- Install and activate the Print My Blog plugin.
- Navigate to Print My Blog → Settings from your WordPress dashboard. Check the Posts box and select Save Settings.
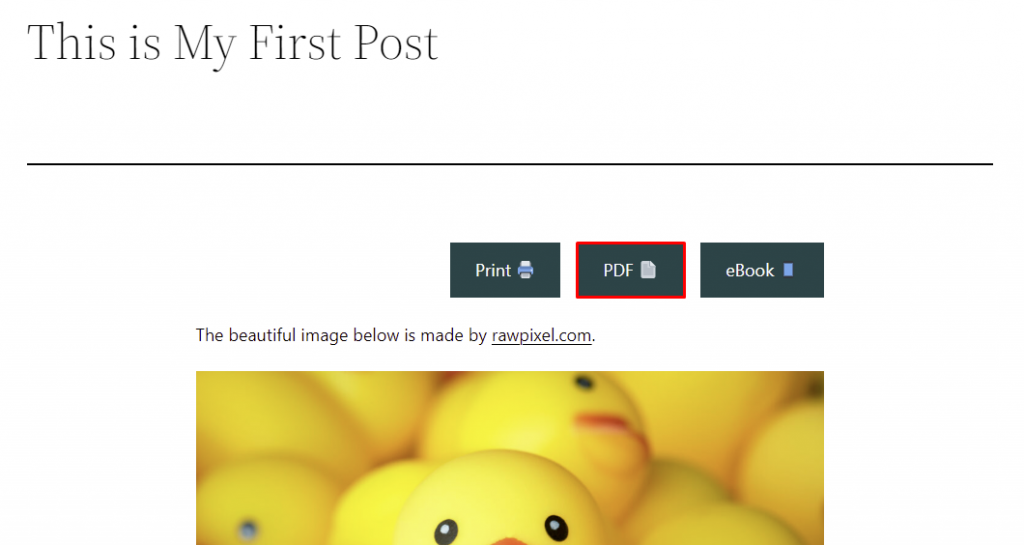
- Go to the post you want to export. A button labeled PDF should appear on the upper part of the page.
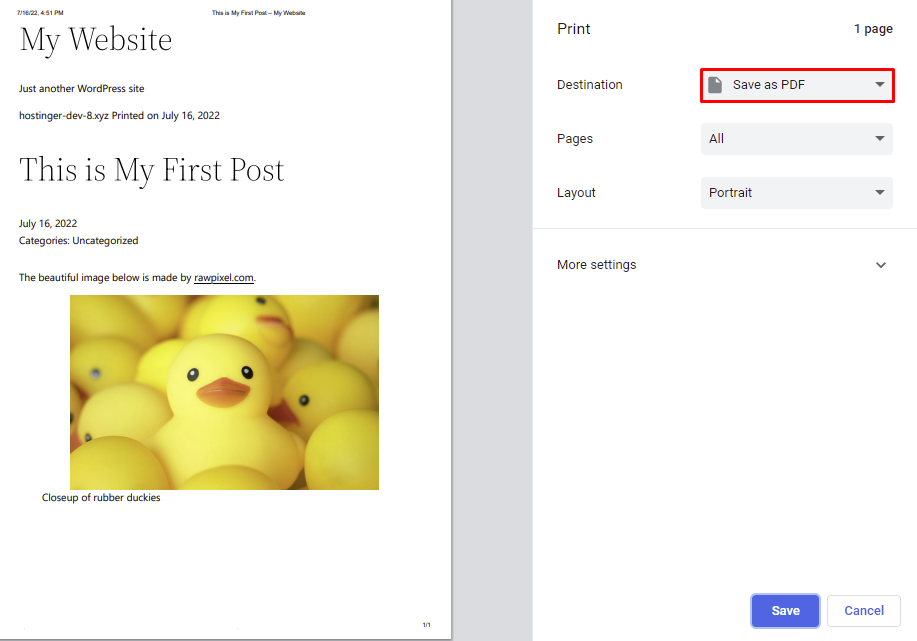
- A popup window will appear upon clicking on the PDF option. If you click the Print to PDF button, your browser’s print settings will appear. Set the destination to Save as PDF and select Save.
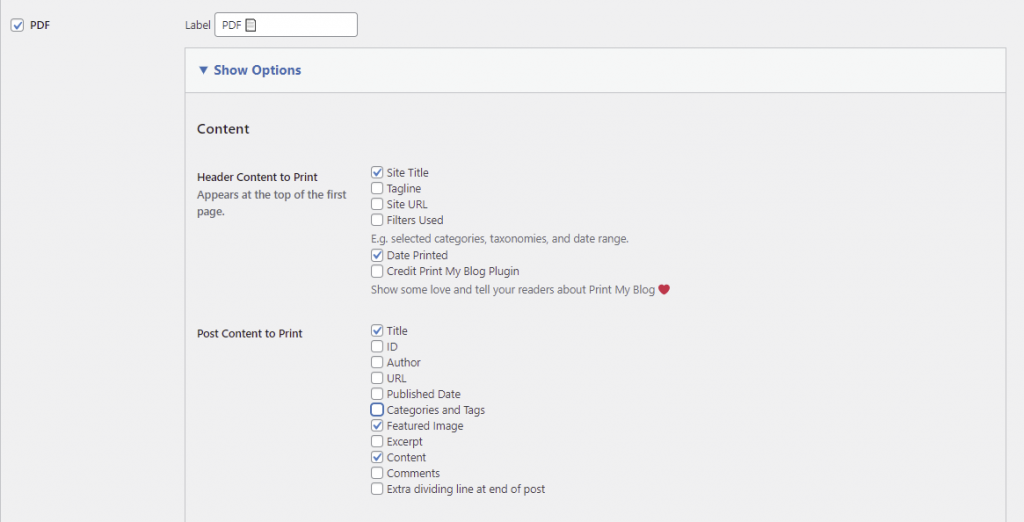
The export process above uses the plugin’s default settings. You can customize the content to print and page layout settings via Print My Blog → Settings → Customize Buttons.
For example, with the following Content settings, the plugin will export a PDF file containing the site title, date printed, post title, post featured image, and post content.
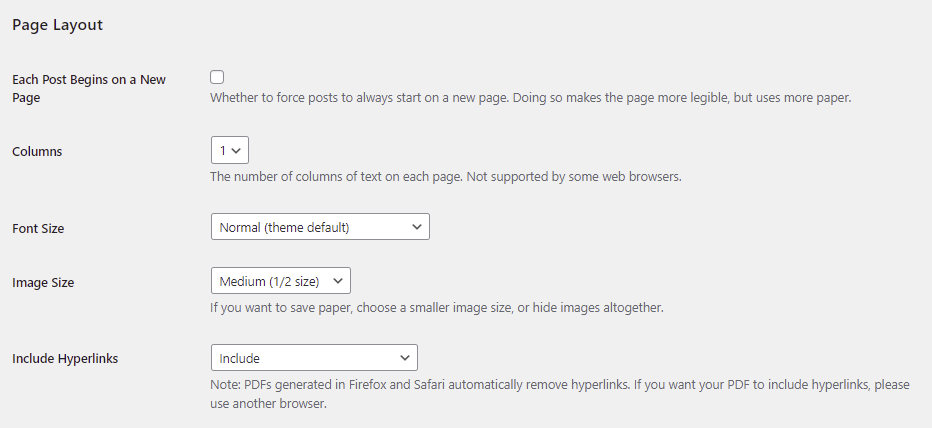
The Page Layout section controls how the post will be displayed. The settings are convenient if you want to export more than one blog post in a single PDF file or condense the content to save paper when printing.

Conclusion
WordPress provides different ways to export WordPress posts into various formats. When the time calls for a post export, you only need to use the proper method to get the desired content.
Now, let’s quickly recap these methods:
- Export all WordPress posts using the Export tool.
- Export specific blog posts from various categories.
- Export blog posts or pages into a Spreadsheet using WPSyncSheets plugin.
- Export WordPress posts with images to PDFs.
Good luck with exporting WordPress posts to your new site. Should you have any more questions, don’t hesitate to leave a comment below.
