WordPress Maintenance Mode: How to Enable and Troubleshoot

Making constant improvements to your WordPress site can ensure excellent performance and user experience. However, doing so can sometimes result in downtime, which can hurt your online presence. This is where maintenance mode, which creates a temporary page to prevent visitors from seeing a broken website, comes into play.
In this beginner-friendly tutorial, we’ll explore different methods to put your WordPress website under maintenance. You’ll also learn how to disable maintenance mode and troubleshoot your website if it’s stuck in it.
Download WordPress security checklist
When to Put Your Site in Maintenance Mode
Let’s look at different scenarios that could benefit from maintenance mode.
- Major updates ‒ prevents users from encountering errors due to incompatibility issues in the WordPress core, theme, or plugins.
- Website redesign ‒ helps maintain a consistent user experience when switching to a new theme or making significant design and structure changes.
- Performance improvements ‒ ensures uninterrupted performance during updates and feature testing.
- Security audits ‒ protects visitors’ data when removing malware and recovering from a hack.
- Content updates ‒ keep your website structure intact when making changes to the content, like adding or deleting pages. Maintenance mode also helps you avoid search engine penalties when making SEO changes, such as updating URLs and meta tags.
- Planned downtime ‒ maintains a professional image and manages visitors’ expectations by communicating when the website will be back online.
To minimize traffic and revenue loss, shorten your WordPress maintenance time by creating a staging environment. The duplicate website allows you to test changes without impacting the live site.
Keep in mind that maintenance mode is different from a coming soon page. Maintenance mode is for temporary downtimes on existing sites, while a coming soon page is for promoting and preparing for the launch of a new site.
See our guide for creating a coming soon page on a WordPress site, which includes easy steps and plugin recommendations for beginners.
3 Ways to Enable WordPress Maintenance Mode
There are four ways to activate WordPress maintenance mode ‒ from Hostinger’s hPanel dashboard, using a maintenance plugin, adding a custom function, and modifying the .htaccess file.
We’ll categorize them by ease of use, so feel free to pick the method that suits you best.
Let’s start with the easiest one.
1. Using the hPanel Dashboard ‒ Easiest Method for Hostinger Users
Hostinger users get easy access to maintenance mode. Simply navigate to WordPress → Overview from the hPanel dashboard, and click on the slider next to the Maintenance mode to activate or deactivate it.
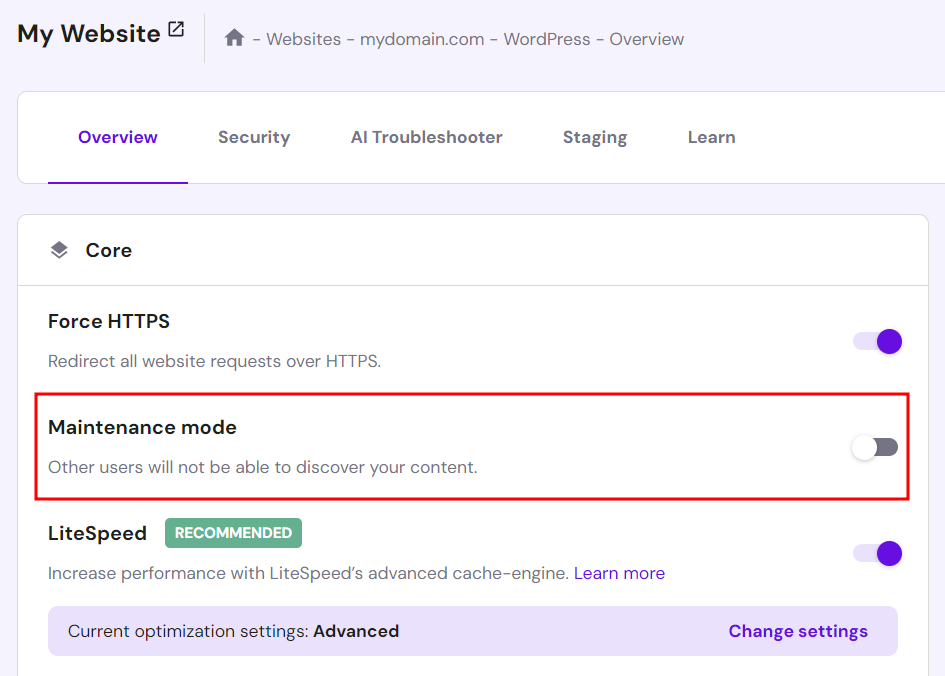
This is the easiest method of the four, as you don’t have to install a plugin or code. However, it doesn’t have any customization settings, meaning your visitors will see our default maintenance mode page.

Check out our WordPress tutorial to see other convenient features that are accessible from the hPanel dashboard.
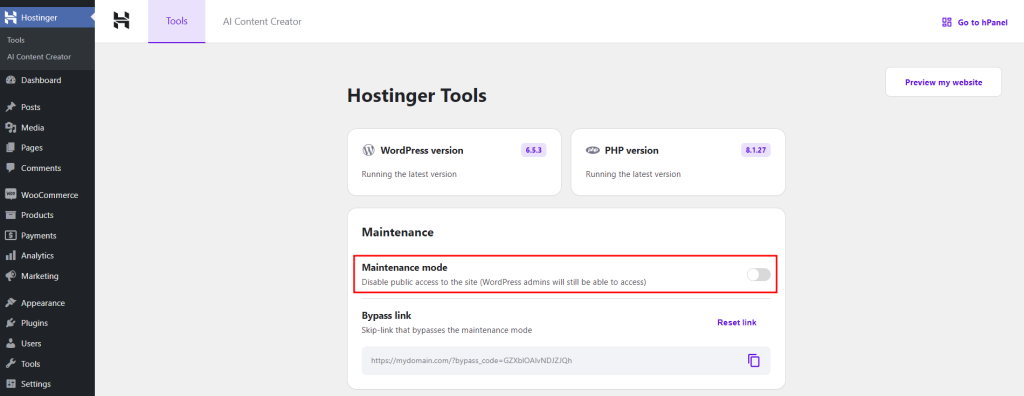
Another way to enable maintenance mode is to use Hostinger Tools plugin. Hostinger automatically installs it during the WordPress setup process to save you time.
To enable maintenance mode using this plugin, go to Hostinger → Tools from your WordPress dashboard. Then, toggle on the Maintenance mode option to enable it. You’ll also get a link to bypass maintenance mode that you can share with other users.

2. Utilizing a Plugin ‒ Best for Beginners
For non-Hostinger users, the most convenient way to enable maintenance mode is by using a plugin.
Many maintenance plugins allow you to design a custom maintenance mode page and activate it with just a few clicks. Consider adding these key elements to your maintenance page fora professional look:
- Maintenance message ‒ a concise message explaining that the site is currently undergoing maintenance.
- Logo and branding ‒ use image blocks to add your branding elements and create a consistent look.
- Countdown timer ‒ shows the remaining time until the site is live again. Since the Countdown block is a premium feature, use a Text block to communicate the estimated downtime.
- Subscription form ‒ allows visitors to sign up to be notified when the site is back online.
- Alternate access details ‒ offers other ways to access the website’s services or information during downtime. For example, link your social media accounts so visitors can go there instead.
We’ll take a closer look at two of the most popular maintenance mode plugins ‒ SeedProd and LightStart.
SeedProd
SeedProd is a freemium WordPress plugin that offers a drag-and-drop builder for creating various page types, including a custom maintenance page. It has plenty of premade templates, so you don’t have to start from scratch.
The premium version, starting at $39.50/year, gives you access to more template options. Paid users can also design custom 404 and login pages with the plugin.
Follow these steps to set up a WordPress maintenance mode page using SeedProd’s free version:
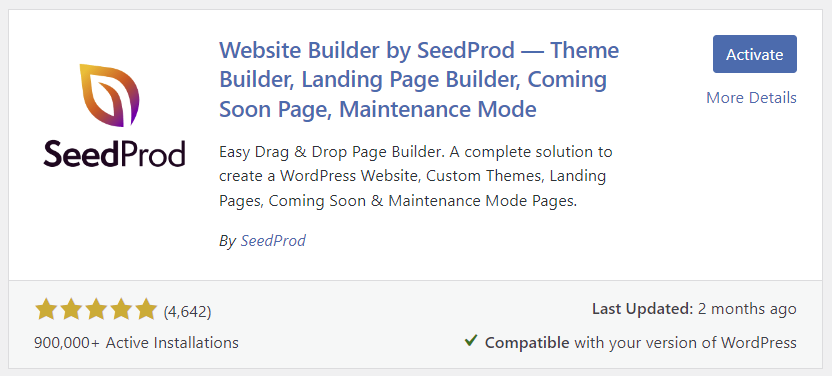
- Install and activate the SeedProd plugin. If you can’t access your WordPress dashboard, consult our plugin installation guide for other methods.
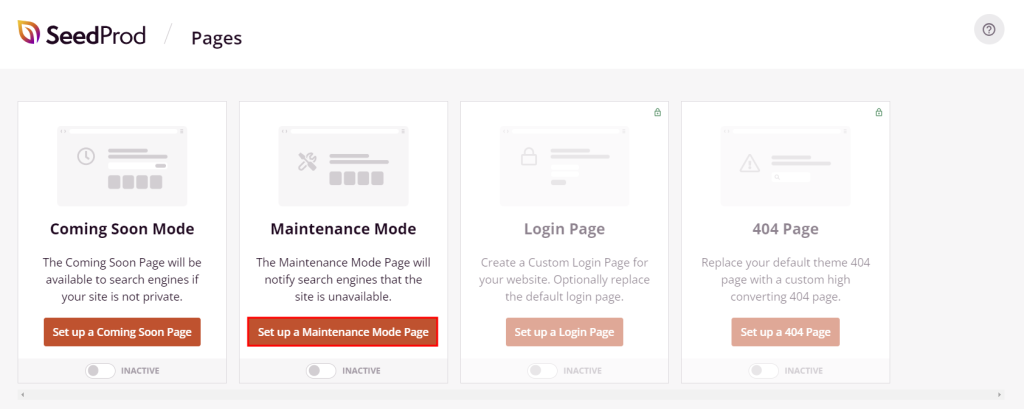
- Open the SeedProd tab on the left sidebar of your WordPress dashboard and select Set up a Maintenance Mode Page.
- Choose a free maintenance mode page template from the library. You can unlock more free template options by signing up for SeedProd’s newsletter.
- As you enter the page editor, customize the template by dragging and dropping elements. Click Preview to see how the page looks, and hit Save once you’re happy with the final design.
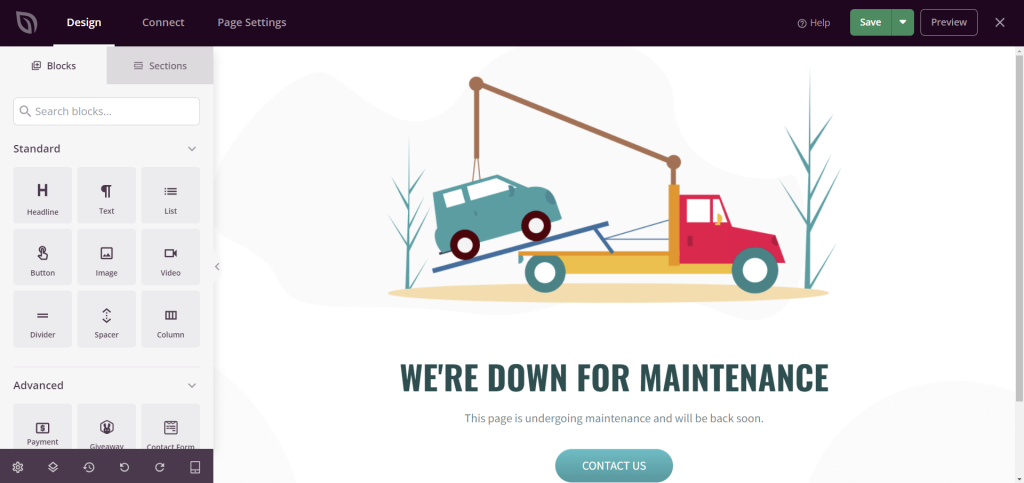
- Click the cross symbol on the top right corner of the editor. SeedProd will ask whether you want to enable maintenance mode. Select Yes, Activate to confirm.
- You’ll be redirected back to the SeedProd dashboard. Make sure the Maintenance Mode setting is set to Active.
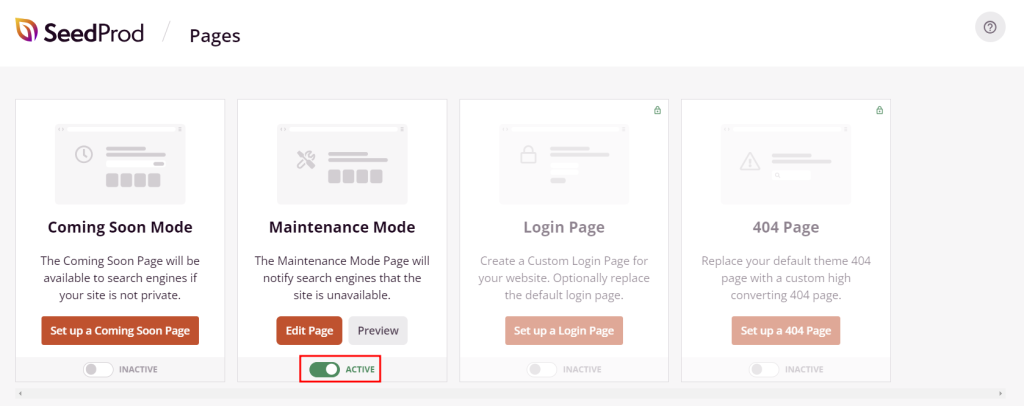
- Click Edit Page to make further changes to the page.
- Toggle the setting off to deactivate maintenance mode after completing all your maintenance tasks.
LightStart
Also known as WP Maintenance mode, LightStart integrates its builder with the WordPress block editor. It’s simple to use for beginners, even without drag-and-drop functionality.
While the plugin is free, it fully relies on Otter Blocks’ block-based features. LightStart will automatically install the sister plugin’s free version as part of its setup requirement. You can upgrade to the paid version of Otter Blocks starting at $49/year to unlock advanced features like animations and visibility conditions.
Here’s how to set up a custom maintenance mode page using LightStart:
- Install and activate the LightStart plugin.
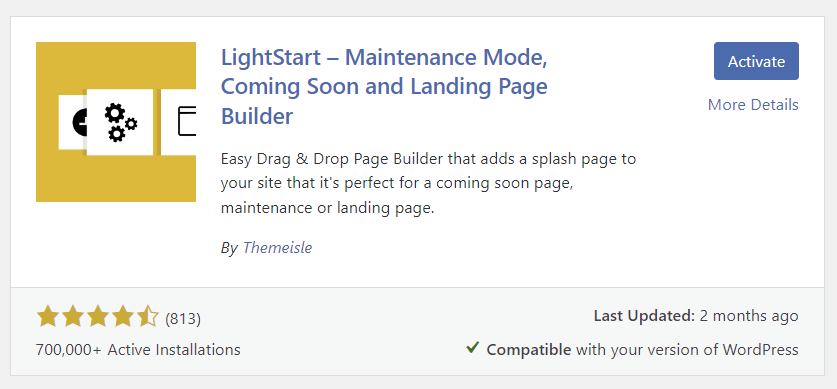
- Go to LightStart from the WordPress dashboard and select the Maintenance mode page type. Check the image optimization option and hit Continue.

- Configure the settings within the General tab as follows:
- Status ‒ set it to Activated. Don’t forget to have the mode Deactivated once your website is ready to go live again.
- Bypass for Search Bots ‒ pick Yes to maintain search engine rankings and avoid SEO penalties due to downtime. Keep in mind that doing so might cause discrepancies between search results and the actual content.
- Back end and Front end Role ‒ decide which roles can access the site’s back end and front end.
- Robots Meta Tag ‒ go with the default index, follow option to keep it consistent with the search bot setting.
- Exclude ‒ add feed, pages, archives, or IP addresses you want to exclude from maintenance mode.
- Notice ‒ set it to Yes if you want to receive notices during the maintenance period.
- After saving the new settings, open the Design tab and import a starter template for your maintenance mode page. To save time, pick a template that comes with the element you need, such as a countdown timer or a subscription form.
- A notification popup will appear once the import is complete. Select Go to page to customize it.
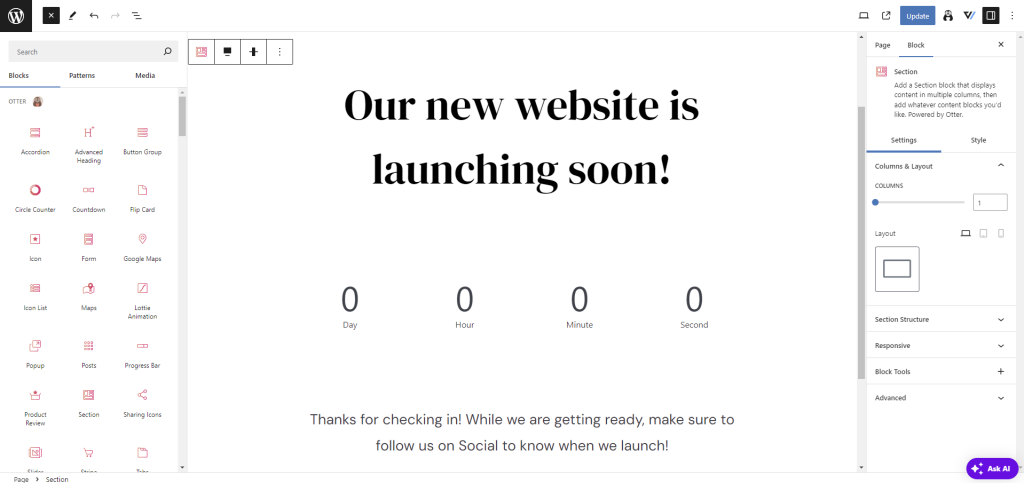
- In the WordPress editor, edit the template like any other page. Drag and drop elements from the Blocks library to add extra elements and features. Hit Update once you’re done.
- Return to the LightStart section and open the Module tab. Here, you can enable Google Analytics tracking to monitor your website traffic during the maintenance period. Remember to Save settings if you make any changes.
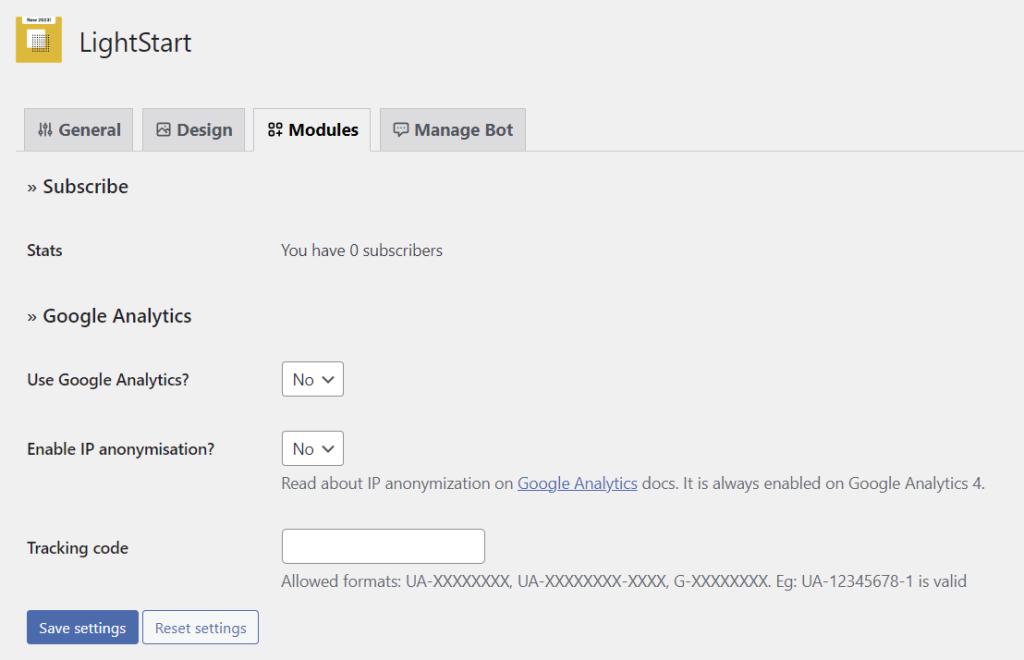
- Open the Manage Bot tab and set up the conversation steps to capture leads. Activating the bot without changing messages will prompt it to build an email list. Hit Save settings to confirm.
3. Manually ‒ Best for Advanced Users
Installing too many plugins can slow down a WordPress site, so advanced users often choose to enable maintenance mode manually with custom code. This method offers full control over the maintenance mode, letting you customize it to your needs.
There are two ways to configure maintenance mode manually ‒ with a custom function and by modifying the .htaccess file.
Important! Back up your website first before editing code to prevent data loss in case something goes wrong.
Using a Custom Function
This method involves adding WordPress actions and hooks to the theme’s functions.php file to activate the maintenance mode. It’s also PHP-based, offering flexibility in triggering and displaying the mode.
However, since it’s theme-dependent, you need to replicate the changes in the new theme’s file when switching themes.
You can use your web host’s File Manager or an FTP client like FileZilla to access your website files.
Here’s how to activate maintenance mode using a custom function via hPanel’s File Manager:
- Go to Dashboard → File manager from hPanel.
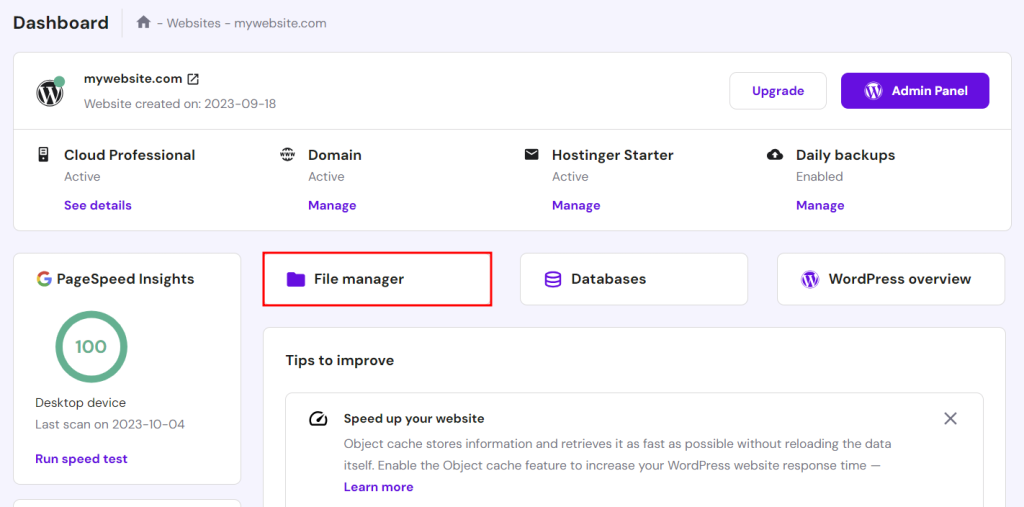
- Access the root directory (public_html) and open wp-content → themes. Locate the functions.php file in your active theme’s folder.
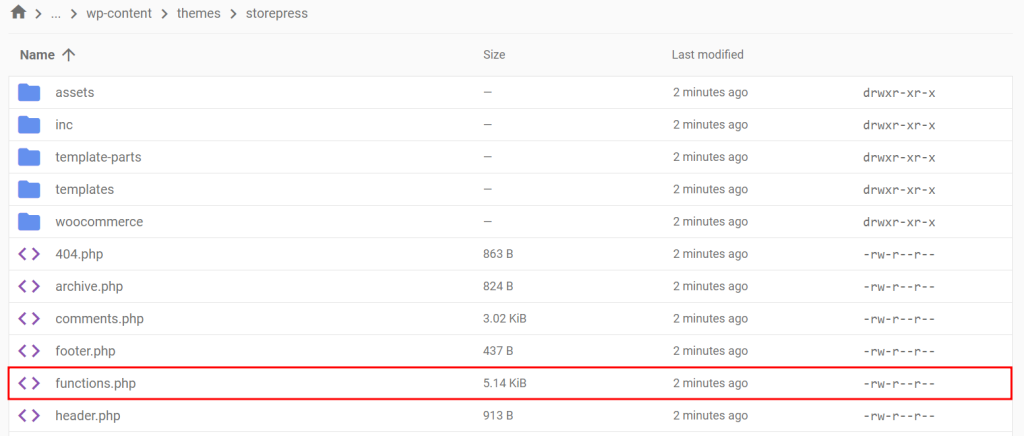
- Double-click on the file and add the following code snippet at the end of the file:
// Activate WordPress Maintenance Mode

function wp_maintenance_mode() {

if (!current_user_can('edit_themes') || !is_user_logged_in()) {

wp_die('<h1>Under Maintenance</h1><br />We’re hard at work improving our site for you. We’ll be back online shortly. Thanks for bearing with us!');

}

}

add_action('get_header', 'wp_maintenance_mode');
Feel free to personalize the HTML message on the fourth line.
- Hit Save and open your website in a browser to ensure maintenance mode is active. The default maintenance page for WordPress should look like this:

- After completing maintenance, remove the code from functions.php to make the website live again.
To prevent website updates from undoing this configuration, set up a child theme and add the code to its functions.php file.
Modifying the .htaccess File
Unlike the custom function method, modifying the .htaccess file lets you set server-level rules. This makes it ideal for enabling maintenance mode on WordPress multisite.
Follow these steps to activate maintenance mode using .htaccess:
- Create a maintenance.html file using Notepad, TextEdit, or code editors like Notepad++ or TextMate. Add this code snippet with the custom message inside:
<!DOCTYPE html>

<html lang="en">

<head>

    <meta charset="UTF-8">

    <meta name="viewport" content="width=device-width, initial-scale=1.0">

    <title>Maintenance Mode</title>

    <style>

        body {

            font-family: Arial, sans-serif;

            text-align: center;

            padding: 50px;

        }

        h1 {

            font-size: 50px;

        }

        p {

            font-size: 20px;

        }

    </style>

</head>

<body>

    <h1>Hang Tight!</h1>

    <p>We’re hard at work improving our site for you. We’ll be back online shortly. Thanks for bearing with us!</p>

</body>

</html>
- Access your website files using your web host’s File Manager or an FTP client, then upload maintenance.html to the public_html folder.
- Locate the .htaccess file in your root directory. See our guide if you need help locating or creating a .htaccess file.
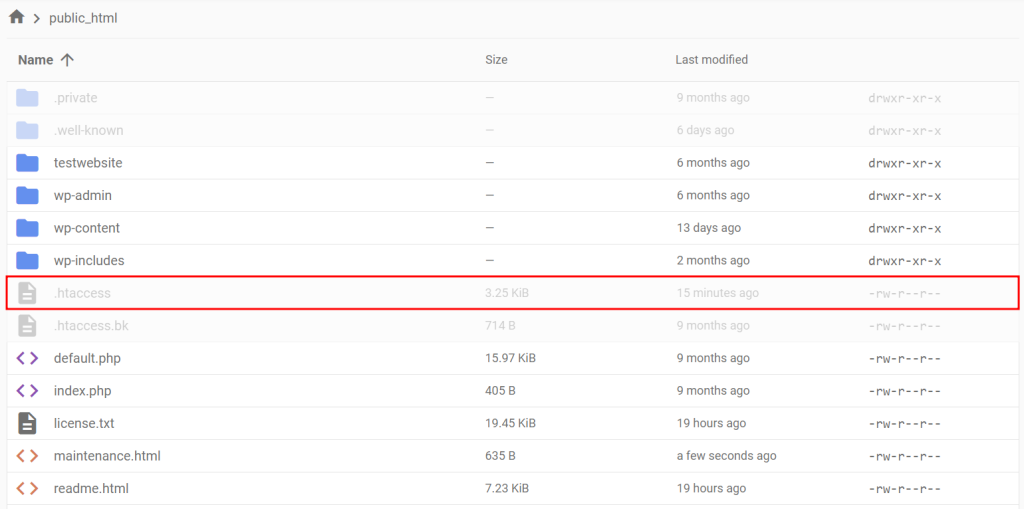
- Add the following code snippet to the .htaccess file above the # END WordPress line:
RewriteEngine On

RewriteBase /

RewriteCond %{REQUEST_URI} !^/maintenance\.html$

RewriteRule ^(.*)$ https://example.com/maintenance.html [R=307,L]
Don’t forget to replace example.com with your own domain name.
- Hit Save and open your website to check whether it redirects you to the maintenance HTML page.

- Remember to remove the code from the .htaccess file after completing your maintenance tasks.
Is Your WordPress Site Stuck in Maintenance Mode?
While disabling maintenance mode should be easy, errors can still happen.
Interrupted or incomplete updates, large updates, incorrect file permissions, or server configuration issues can cause your WordPress site to get stuck in maintenance mode.
In most cases, deleting the .maintenance file in public_html resolves the error. This solution also applies if the error occurs during website updates. WordPress automatically activates maintenance mode to keep your site from looking broken on the front end.
If you can’t find the .maintenance file, the error might be due to plugin or theme incompatibility. Deactivate all plugins to confirm, then reactivate each plugin to identify the source of the error. Repeat these steps for your themes.
Hostinger users who can’t access their WordPress dashboard can deactivate their plugins and themes through hPanel. Head to WordPress → Security and toggle off the Activate option.
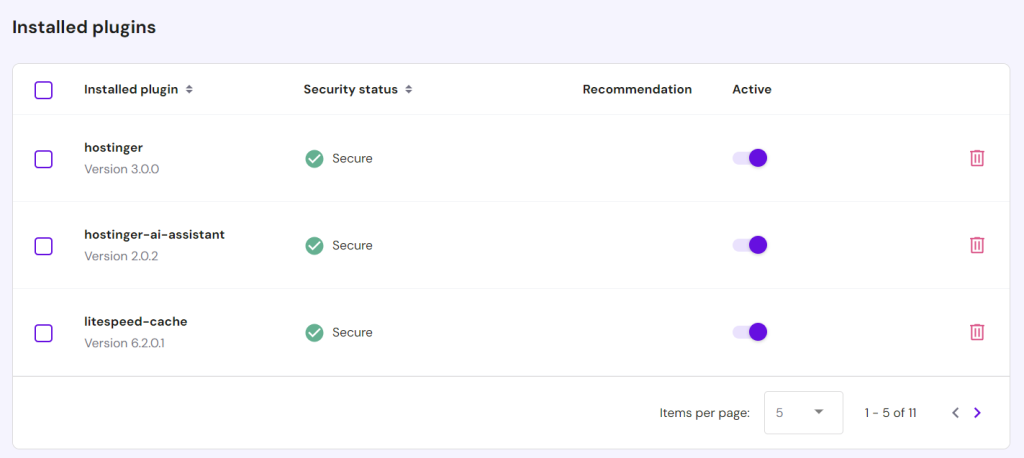
To avoid the maintenance mode error in the future, keep these in mind:
- Keep your browser tab open when updating WordPress.
- Avoid updating plugins and themes in bulk. Instead, enable WordPress automatic updates to avoid incompatibility issues and reduce security risks.
- Insufficient storage space can cause updates to fail and put the website in maintenance mode. If your current hosting plan no longer suits your needs, consider upgrading. Hostinger’s Cloud Professional plan offers 250 GB NVMe storage, 6 GB RAM, daily and on-demand backups, and unlimited bandwidth for £13.99/month.
Check out our guide on fixing the WordPress Site Stuck in Maintenance Mode issue for more troubleshooting tips.
Conclusion
When enabled, maintenance mode makes your WordPress private, allowing you to make changes and troubleshoot issues without impacting user experience.
Moreover, notifying visitors about your site’s status builds trust and preserves brand credibility.
Let’s recap four ways to put your website into maintenance mode:
- Through Hostinger’s hPanel dashboard.
- Using a WordPress maintenance plugin.
- Adding a custom function to the functions.php file.
- Modifying the .htaccess file.
We hope this article helped you learn how to apply WordPress maintenance mode effectively. If you have any questions, check out our FAQ section or leave a comment below.
WordPress Maintenance Mode FAQ
This section answers some of the most common questions about WordPress maintenance mode.
Which Tasks Can I Do When My WordPress Website Is in Maintenance Mode?
When your WordPress site is in maintenance mode, you can fix errors, back up the site, perform updates, optimize the database, audit security features, and redesign the site without affecting user experience. However, you can’t perform tasks like live content updates, real-time user interactions, transaction processing, or comment moderation, as the site is temporarily inaccessible to visitors.
How Do I Redirect Users to a Custom URL During Maintenance Mode in WordPress?
During WordPress maintenance mode, the easiest way to redirect users to a custom URL is to use a plugin like SeedProd or WP Maintenance Mode. You can also add the wp_redirect WordPress function to your theme’s functions.php file to set up a temporary conditional redirect.
Where Can I Get Support for a Specific Maintenance Mode Plugin in WordPress?
You can get support for a specific maintenance mode plugin from its official website or the WordPress support forum. Premium plugins often provide support directly through dedicated support channels like live chat and email. Consider support availability and accessibility when choosing a maintenance mode plugin.


