How to Start a Travel Blog in 2024: A Step-by-Step Guide for Beginners

If you’re looking for a well-paying job that lets you travel, becoming a professional travel blogger is an excellent option. But without the right approach, starting a blog from scratch can be challenging and time-consuming.
To help with the process, this article will provide a step-by-step tutorial on how to start a travel blog website – from researching the niche to making money blogging.
We will explore each step in-depth, offer travel blogging tips, and answer frequently asked questions about the topic.
1. Research Your Niche
The first step in building a successful blog is finding the right blog niche idea. This will give the website a distinctive identity, helping it stand out within the saturated travel blogging community.
If you’re unsure where to start, here are some travel blogging niche examples:
- Budget traveling. Write articles about affordable travel gear and accommodation for readers who want to travel on a budget.
- Luxury traveling. Luxury travel bloggers often review exotic destinations and share exclusive travel tips for those seeking lavish traveling experiences.
- Family-friendly traveling. Recommend kid-friendly itineraries and destinations for families.
- Solo traveling. Offer tips and tricks to make new friends and stay safe during solo trips.
After choosing a niche, research the target audience to understand their pain points and goals. This way, you can create content that attracts visitors with a common interest and build a loyal reader base.
Consistently writing about a specific topic is also great for search engine optimization (SEO). This signals your site’s expertise, helping it climb the rankings for related keywords. The higher the travel blog ranks, the more traffic it will acquire.
Expert Tip
If you aren’t familiar with the topic, research first and become an expert. Since Google follows the Expertise, Authority, and Trust (EAT) guideline, expert content is more likely to do better. This is because experts are less likely to produce false information.

To find content ideas that appeal to your niche audience, follow these tips:
- Browse social media. Observe what travel brands the audience follows and which posts receive the most engagement.
- Conduct competitive research. Learn from other professional travel bloggers within the same niche. Read their articles and analyze the areas you can improve.
- Read comments. Comments on top travel blogs usually include community feedback, which is great for generating ideas.
- Look up statistics. Fact-driven data help travel bloggers find relevant topics, support claims, and boost content authority.
- Follow industry trends. Keep up with the latest travel news to generate fresh content ideas.
2. Come Up With a Memorable Blog Name
When visiting a brand-new blog, one of the first things readers notice is its name. That’s why choosing a memorable blog name is a great way to establish a positive first impression.
A good blog name also attracts interest and informs visitors about the site’s niche. For example, if the blog’s name is Visit Maldives, people will expect to find travel tips and recommendations on the exotic island.
Follow these best practices to find a suitable travel blog website name:
- Brainstorm relevant words. List words related to your travel blogging niche. For instance, family-friendly travel blogs might use terms like “kids,” “babies,” “parents,” and “fun.”
- Use name generators. Use blog name generators to speed up the brainstorming process.
- Think about the target audience. Consider the language and style that suit the target audience. For example, if the blog’s tone is more professional than casual, choose a name that reflects that.
- Get creative. Experiment with unique word combinations and styles. Casual blogs are likely to inject more personality and wit into their name.
- Make it simple and memorable. Avoid complicated words, phrases, characters, and numbers. Instead, come up with a catchy blog name that people can easily remember.
- Ask for second opinions. Pitch several travel blog name options to your target audience and ask them to choose their favorite.
When brainstorming for a blog title, consider the domain name as well. While there are endless possibilities when choosing a blog name, domain addresses are unique. For example, there can only be one awesomesolotrips.com.
Make sure to run a quick domain name search to check if your preferred travel blog name is still available.
Domain Name Checker
Instantly check domain name availability.
After finding a suitable domain name, register it through an ICANN-accredited registrar like Hostinger.
The pricing of domain names varies depending on their perceived value. On average, expect to pay around $10-20/year. However, you can get an even better price by opting for newer extensions. For example, .blog domain costs only $4.59 for the initial registration. You will be charged extra for additional features like domain privacy protection if you want to hide your registration details from the public WHOIS directory.
Fortunately, getting a free domain name and WHOIS privacy protection is possible. Simply purchase one of Hostinger’s hosting plans with a free domain name starting at £2.49/month to claim yours.

Suggested Reading
What Is a Domain Name? A Beginner-Friendly Guide
How to Buy a Domain Name: A Simple Guide to Get You Started
3. Pick a Blogging Platform
The next step in starting a travel blog is to pick the best blogging platform. Generally, there are two categories to choose from – a content management system (CMS) and a website builder.
A CMS is a program that lets users create, manage, and modify website content. With about 60% market share, WordPress is the most popular CMS.
While WordPress offers a user-friendly interface, some users may need to first get acquainted with how the WordPress dashboard works.
On the other hand, website builders often come with a drag-and-drop editor, resulting in a faster learning process. A great example is Hostinger Website Builder, which enables you to create a blog website in minutes.
Both blogging platforms let you build websites without having to code, but each solution has its own strengths and weaknesses.
If you’re unsure which one to pick, let’s see the comparison between a website builder vs WordPress in more detail.
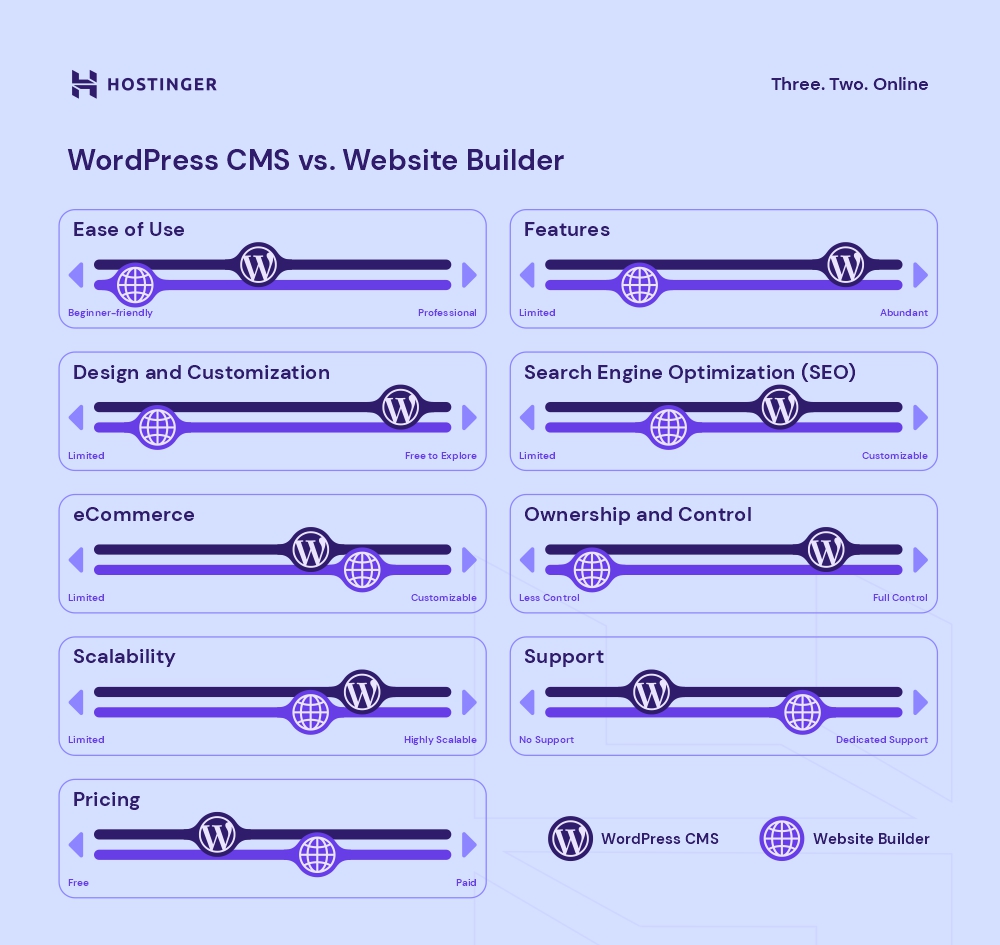
WordPress
WordPress offers a rich library of plugins and themes, providing excellent customization and scalability. There’s a plugin for almost every website functionality you need.
Moreover, using WordPress lets you migrate your website from one hosting provider to another without hassle.
That said, beginners might initially struggle to navigate through the WordPress dashboard. It takes time to get used to all the features WordPress has to offer.
Cost-wise, the platform itself is free to install and use, but you must purchase a hosting plan, domain name, and SSL certificate separately. This is not to mention buying premium plugins for more advanced features you may need.
Pros:
- Extensive library of third-party plugins and themes
- Migrating between different web hosts is possible
- More control over the site’s backend
Cons:
- Steep learning curve compared to a website builder
- Total website-building costs can be more expensive with premium plugins and themes
Best for: users with some technical knowledge who prefer extensive customization
Suggested Reading
Find out how WordPress compares to other popular blogging platforms by reading our articles:
WordPress vs Medium
Blogger vs WordPress.
Hostinger Website Builder
If you want a more seamless website-building experience, we recommend Hostinger Website Builder.
With the help of AI, generating the initial design of your blog takes just a few minutes. You can then customize the web elements to your preferences and add new pages using the intuitive editor.
In addition, this platform offers an AI Writer tool to help you write and publish blog posts faster.
Another highlight is its scalability. Since Hostinger offers the builder to all users, you can start with a basic shared plan and upgrade hosting resources as needed. This is excellent for site owners needing cloud or VPS solutions while still wanting the ease of a website builder.
Pros:
- Drag-and-drop visual editor with heatmap analysis
- AI tools for faster website creation, including an AI Logo Maker
- Built-in SEO and eCommerce features
Cons:
- Phone support is unavailable, but users can contact the Customer Success team via email and live chat anytime.
Best for: beginners and busy business owners who want a seamless website-building experience

In short, both platforms are equally great options – it just depends on what you need.
If you want hands-on control and flexibility, go with WordPress. However, if you prefer a more user-friendly and effortless web-building experience, choose Hostinger Website Builder.
Regardless of the platform, you must sign up for a hosting service before building a travel blog.
4. Set Up Web Hosting
Web hosting is a service that lets users rent server space to store website data. There are many hosting companies on the market, each offering various hosting plans at different prices.
Usually, basic plans have limited bandwidth and only allow hosting one website. In contrast, advanced plans may offer more resources to host multiple websites.
Choosing the right hosting provider and plan is crucial to ensure a stable WordPress blog performance. Pay attention to the following criteria when selecting a hosting company:
- Security. Select a web host offering robust security features, such as free SSL certificates, firewalls, regular software updates, and DDoS attack countermeasures.
- Speed. A fast-loading website is essential to provide the best user experience and retain visitors. Select a speedy hosting provider that has data centers worldwide and uses advanced web hosting technology.
- Uptime. Uptime refers to a period when a hosting server is up and running. The current industry standard is 99.9%, which you should prioritize when browsing web hosts.
- Support. When starting a travel blog, issues may come up along the way. A good hosting provider should provide 24/7 customer support to help users troubleshoot errors.
If you prefer WordPress, Hostinger provides secure and fast WordPress hosting plans with a 99.9% uptime guarantee, 24/7 live chat support, and a free domain name for the first year.
Our managed WordPress plans also include automated backups and updates, Multisite support, LiteSpeed cache for maximum performance, and an auto-installer that lets you install WordPress quickly.

On the other hand, if you want to try Hostinger Website Builder, purchase our bundled Website Builder and Web Hosting package. It offers everything a standard hosting plan offers, plus a drag-and-drop editor and a suite of AI tools.
After purchasing a hosting plan, the next step is customizing the site.
5. Customize Your Travel Blog
An attractive and easy-to-use travel blog will leave a positive first impression on visitors and compel them to keep reading. This section will show you how to customize the blog’s look, functionality, and features.
Establish Your Branding
Before designing the WordPress site or creating any content, you’ll need to establish a strong brand identity. This will distinguish your travel website from other bloggers, making it more recognizable and memorable to new readers. Follow these best practices:
- Understand the target audience. Conduct user studies to understand the audience’s interests and characteristics. For example, if your niche is budget travel, the target audience is likely aspiring backpackers looking for low-cost travel recommendations.
- Define the blog’s goals. After learning about the target market, define the blog’s goals and values that cater to them. For instance, The Points Guy aims to help readers reduce travel expenses by accumulating credit card points.
- Build effective brand communication. Use compelling narratives so that your site’s values resonate with the audience. For example, inspire the readers by telling a story about the blog’s inception and the obstacles you had to overcome.
- Be consistent. Express the brand message and goals through every element on the website. This includes color schemes, fonts, blog titles, taglines, and images.
- Adjust the writing style. When creating blog posts, match the writing style and voice with the brand’s identity. For example, casual blogs might use simple language and a friendly tone.
- Be authentic. Avoid publishing content that other bloggers already cover. Instead, offer unique travel blogging tips based on your personal experience.
Pick a Theme for Your Travel Blog
Another crucial step in brand-building is creating a visual identity. Thankfully, WordPress offers various themes on the official WordPress library or third-party sources.
When choosing a professional theme, pay attention to these factors:
- Pricing. The theme should offer various pricing options for different budgets. When opting for a paid version, make sure it provides value for money.
- Features. Check whether the theme has all the features you need, such as a rich font library, dedicated support, and compatibility with the WordPress Gutenberg editor.
- Updates. Ensure the theme is regularly updated. Outdated themes can be vulnerable to security breaches.
- Uniqueness. Choose a theme that offers customization tools. A unique website look makes you stand out among competitors.
- Code quality. A theme with high-quality code will help web pages load faster, boosting the overall user experience.
- Responsiveness. Mobile devices account for 58.99% of all web traffic, so choosing a mobile-friendly theme is crucial. If a mobile site doesn’t load within five seconds, 74% of American visitors will abandon it.
Free WordPress themes may be enough for most blogs. However, others may significantly benefit from upgrading to a paid one. Here are some areas where free and premium themes differ:
- The number of features. A free theme usually has limited features. Meanwhile, premium themes offer more functionalities, such as page templates, multiple fonts, and custom-made elements.
- Frequency of updates. Many WordPress attacks happen due to security vulnerabilities found in outdated themes. A premium theme is more likely to be updated frequently than a free one.
- Support channel. Most free themes do not provide a dedicated support channel, while many premium ones do. With access to dedicated support, users who encounter an issue can easily ask for help.
Here are some WordPress blog themes we recommend:
- Hostinger Blog Theme. A free in-house WordPress theme that’s available with our Business Web Hosting and Cloud Hosting plans. It’s fully responsive and powered by an AI content generator with Unsplash integration, allowing you to populate your website with unique, relevant copy and beautiful stock images in minutes.
- Blossom Travel. A freemium theme designed for building an elegant and feminine travel blog, Blossom Travel is fully responsive and optimized for search engines. The theme also has unlimited color options, multiple custom-made widgets, and video banner support.
- Astra. A fast and powerful WordPress theme with 240+ pre-made Starter Templates. Astra is compatible with leading page builders, providing all the tools you need to create an engaging travel blog.
- Bingle. A multi-purpose theme with 11 pre-built starter sites, including one suitable for an SEO-friendly and mobile-responsive travel blog.
- Essence Pro. A sophisticated professional theme designed for bloggers in various niches. Apart from mobile responsiveness and WooCommerce compatibility, it supports accessibility features and the Genesis Framework for intuitive customization.
- Soledad. A multi-concept professional theme for various blogging purposes. In addition to a speed, SEO, and mobile-friendliness guarantee, Soledad includes 220+ pre-built starter sites and AMP for faster loading.
To install a WordPress theme, open the dashboard and head to Appearance → Themes. Select Add New and browse through the WordPress library. After finding a suitable theme, click Install and Activate.
Alternatively, download a theme from third-party sources like Envato Market and MOJO. After that, click Add New → Upload Theme, choose the ZIP file of the theme, and install it.
Use the Gutenberg block editor to customize the site further. Some themes also support drag-and-drop page builders like WPBakery and SiteOrigin. This enables users to tweak elements in real-time and in more detail.
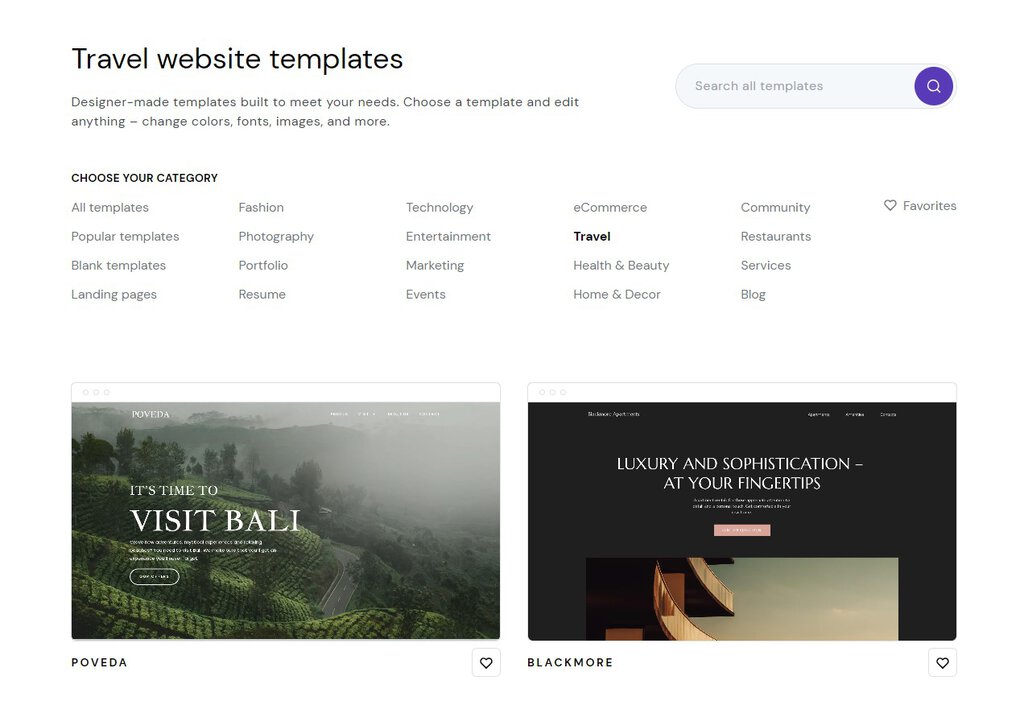
Likewise, Hostinger Website Builder has over 100 fully customizable templates you can pick for your travel blog. The themes are also responsive and optimized for any screen size.
On the templates page, you can go to the Travel category and browse pre-made website themes relevant to your niche. Alternatively, head over to the Blog category to check out more template options.
Create a Logo and a Slogan
A logo is a visual representation of the travel blog, usually in the form of a lettermark, wordmark, or symbol. It communicates the brand’s values and makes it more recognizable.
Before creating a logo, it’s essential to determine what messages it should convey and how it relates to your overall branding.
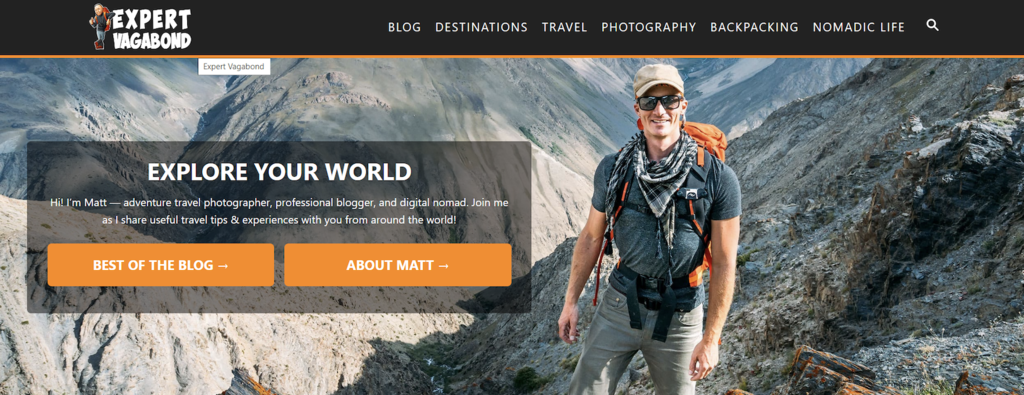
For inspiration, take notes from the best travel blogs:
- Expert Vagabond. This travel blog’s logo illustrates the person who runs it, giving a personal touch to the brand.
- Hand Luggage Only. The logo is a simple handwritten wordmark that fits the site’s overall branding.
- Adventurous Kate. One of the top personal travel blogs for solo female travelers, Adventure Kate’s logo gives off a fun, feminine, yet bold impression. The travel blog achieves this by combining a script-style font and an elegant one in all caps.
- Travel Freak. With a bolded font, bicolor scheme, and simple mountain illustration, this blog’s logo is simple yet dynamic.
Depending on the budget and design skills, there are several options for creating a logo.
If you’re well-versed in graphic design, try creating different sketches by hand. After that, pick one that suits your brand and blog design.
To help with the selection process, consult other travelers or members of the target audience. After deciding on a sketch, create its digital version using software like Photoshop.
Travel bloggers with limited design skills can use the Hostinger AI Logo Maker. Leveraging the power of machine learning, this tool offers an affordable and easy way to create a unique logo instantly.
Another option is to hire a professional graphic designer. Although it requires some investment upfront, they can make you a high-quality logo.
Look for an agency or a freelance designer on websites like Upwork or 99designs. Before hiring a designer, find one whose style fits your travel blog’s visual identity, ideas, and needs.
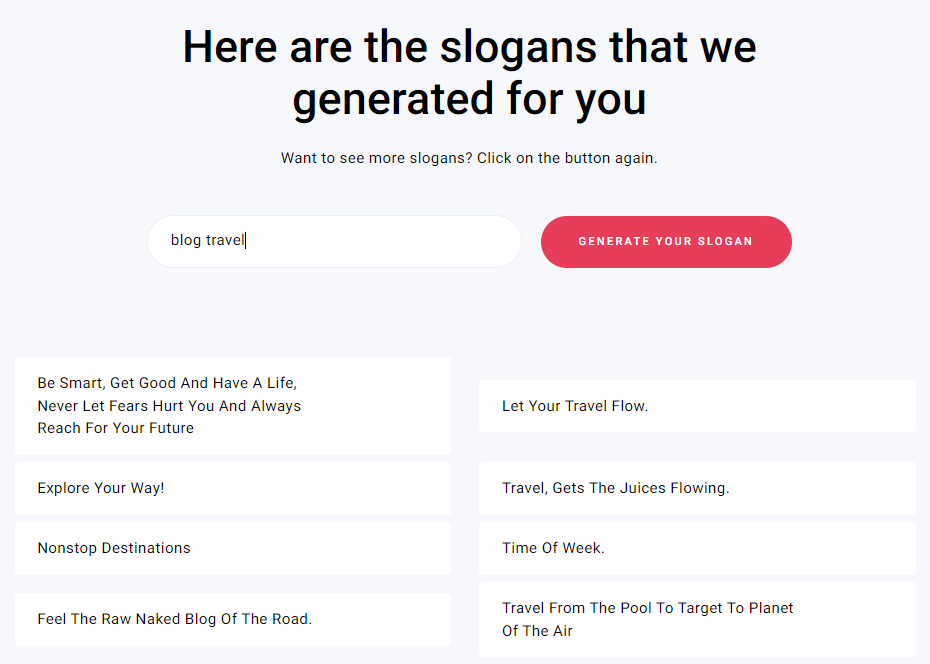
Furthermore, a catchy slogan or tagline is essential to communicate the blog’s purpose and niche.
For example, the name “Traveling Terry” signifies that it’s a travel blog, but only in general. If it comes with a slogan like “Solo travel blogging for beginners,” new readers will immediately understand what to expect from the site’s content.
The process of making a travel blog slogan is similar to creating its name. However, a tagline allows you to use more words, giving them more room for experimentation.
If you’re unsure where to begin, use an online slogan generator. Simply enter a keyword, and the tool will automatically offer phrase ideas.
Design Your Travel Blog
A unique reading experience can do wonders for your blog. Although the actual content matters the most, the look is also important.
The design idea for the travel blog must align with the branding established in the previous steps. Every element must help create a consistent experience throughout the site.
For instance, playful travel blogs might implement bright color schemes, sans serif fonts, and animated elements.
You should also make sure the travel blog is easy to use. Websites with a poor navigation system can frustrate visitors, making it more difficult for them to explore content. We recommend creating a sitemap to ensure a pleasant user flow.
For inspiration, check out these well-designed travel blogs:
- 12hrs. This travel website executes its concept with intuitive navigation and a unique layout. For example, its “12hrs” series uses full-page photos, large headings with colorful backgrounds, and slideshows to create an immersive reading experience.
- Salt in our Hair. An excellent example of a blog that puts user-friendliness first. The navigation menu categorizes travel destinations by continent, making it easier to find the desired content. Aesthetically, the blog uses muted colors, playful fonts, and uniquely framed photos to create a dynamic look.
- Anywhere We Roam. A great example of a simple yet effective web design. This travel blog uses large, striking headers to invite readers to keep browsing. The abundance of white space also elevates the text and images.
Page builder plugins like SiteOrigin and Beaver Builder are excellent for DIY, code-free web design. Alternatively, hire a cheap web developer or designer on freelancing platforms like Upwork.
Install the Necessary Plugins
Plugins let users add extra features to their websites without coding. Some plugins elevate visitors’ experience, while others help website owners perform tasks more efficiently.
With 60,000+ WordPress plugins available in the official library, it’s safe to assume there is one for nearly every need.
To install a WordPress plugin, head to the WordPress dashboard and access Plugins → Add New. Alternatively, users can also install a plugin downloaded from another source by uploading its file. To do this, navigate to Plugins → Add New → Upload Plugin.
Here is a list of the best WordPress plugins for travel blogs:
- Yoast SEO. The most popular SEO plugin with numerous features, such as permalink cleanups, title and meta description templates, and a content analysis tool for writing SEO-friendly articles.
- MonsterInsights. This plugin integrates Google Analytics into the WordPress dashboard, enabling easy access to detailed visitor information.
- Wordfence Security. A plugin that protects websites from malware and cybercrime attacks. Its signature features include a firewall that blocks malicious traffic, a malware scanner, and two-factor authentication login.
- Akismet Spam Protection. The comments section is an excellent place for travel bloggers to connect with their readers. Unfortunately, some messages may contain malicious content. Thankfully, this plugin automatically filters out potential spam comments and misleading URLs.
- LiteSpeed Cache. This all-in-one website acceleration plugin works at the server level to increase site speed. For LiteSpeed-based hosting users, optimizing WordPress with LiteSpeed Cache is a must.
- Smush. Most travel sites have tons of visual content, which can decrease the load speed if not managed properly. This plugin lets travel bloggers optimize, compress, and lazy load images to ensure fast website performance.
- Geo Mashup. As a travel blogger, adding an interactive map to your content can elevate the reader experience. This plugin offers integrations with various map providers, including Google Maps, OpenLayers, and Leaflet.
- Blog2Social. It lets users schedule posts of their articles on various social networks, including Facebook, Twitter, and Pinterest.
- Creative Mail. Email marketing is an excellent way to reach and connect with the target audience. This plugin lets you build email lists and email marketing campaigns directly from the WordPress dashboard.
Remember that installing too many plugins can slow down your website and negatively impact the user experience. Thus, make sure to pick carefully.
With Hostinger Website Builder, you don’t need to install any plugins. It’s equipped with advanced security systems, a pre-installed SEO toolkit, social media integration, and performance analytics.
For example, connect your website with Google Analytics to monitor website metrics, enable AdSense to start making money, and integrate with WhatsApp to communicate with your readers instantly.
6. Set Up the Pages
Another essential element of a travel blog is the web pages. While there is no fixed rule, a travel blog usually has the following content:
- Homepage. To establish a great first impression, it should immediately inform visitors about the site’s travel blogging niche.
- About page. Describe the blog’s goals, values, and mission. To further build a connection with readers, display your picture and tell compelling stories about how to create a travel blog.
- Contact page. Provide your contact information, so travel companies can reach out to offer partnerships.
- Blog page. Offer travel blogging tips, destination recommendations, and travel gear reviews. When setting up a blog page, make sure to add the Query Loop Block so it will update content automatically.
Many travel blogs also add custom pages to help users navigate content quickly. For example, Expert Vagabond has sections like “Destinations,” “Travel,” and “Nomadic Life.” These pages link to other articles within the same category.
To create a page, log in to the WordPress admin dashboard and follow these steps:
- On the left sidebar, go to Pages → Add New.
- Once the block editor appears, enter the page’s title.
- Add blocks from the library to create various types of content and widgets.
- Change the URL based on your preference on the right sidebar.
- Once finished, select Publish.

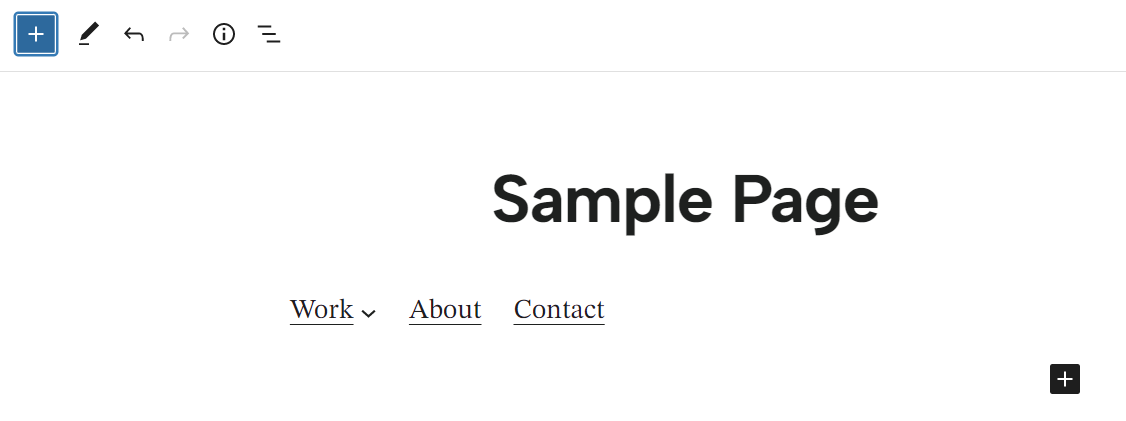
To make certain pages appear on the site’s navigation menu, change the Navigation Block. Here’s how:
- Head to Appearance → Editor.
- Once it displays the block editor, click on the plus icon at the top left.
- Go to Blocks and search for Navigation.
- Add the pages you want to display in the menu.
Adding new pages with Hostinger Website Builder is also easy – it only takes a few clicks to pick a template and personalize it to your liking.
From the editing interface, head to Pages and navigation → Add Page. Here, you’ll see pre-made page options, including About, Contact, and Blog pages.
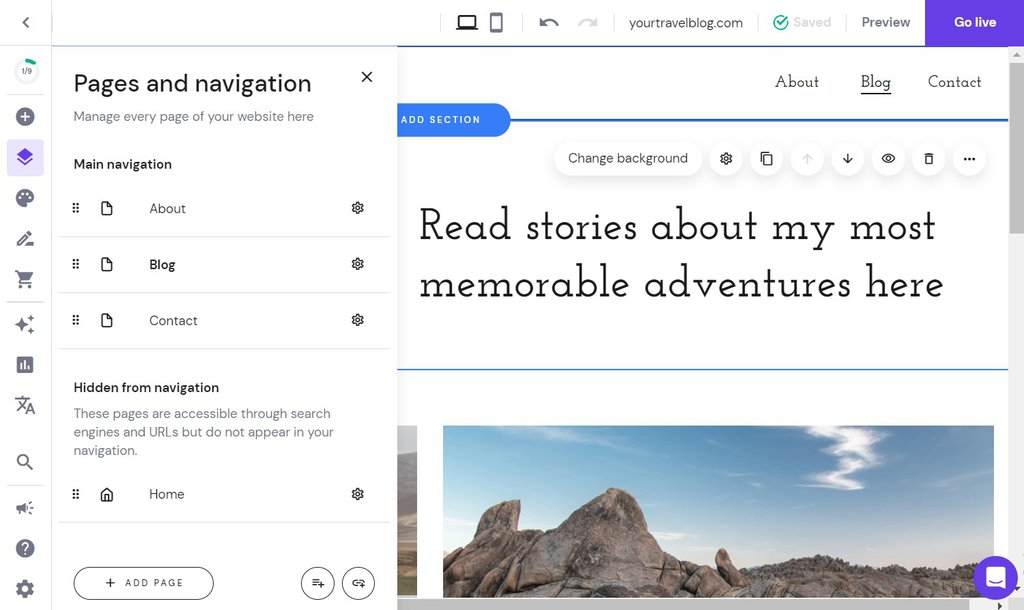
Once selected, those pages will automatically appear on your site’s navigation menu. All that’s left to do now is customizing it to your liking.
7. Publish Your First Blog Posts
After setting up the WordPress website, it’s time to acquire new readers through blog posts. Start by deciding on a topic, writing high-quality content, and setting up the post-publishing schedule.
Determine the Blog Topic
Before writing blog content, it’s crucial to select topics that are relevant to the target audience. A good starting point is to identify their interests and pain points.
To do that, conduct keyword research using tools like Ahrefs. Simply head to Keywords Explorer, enter your travel niche, and the tool will show a list of popular keywords.
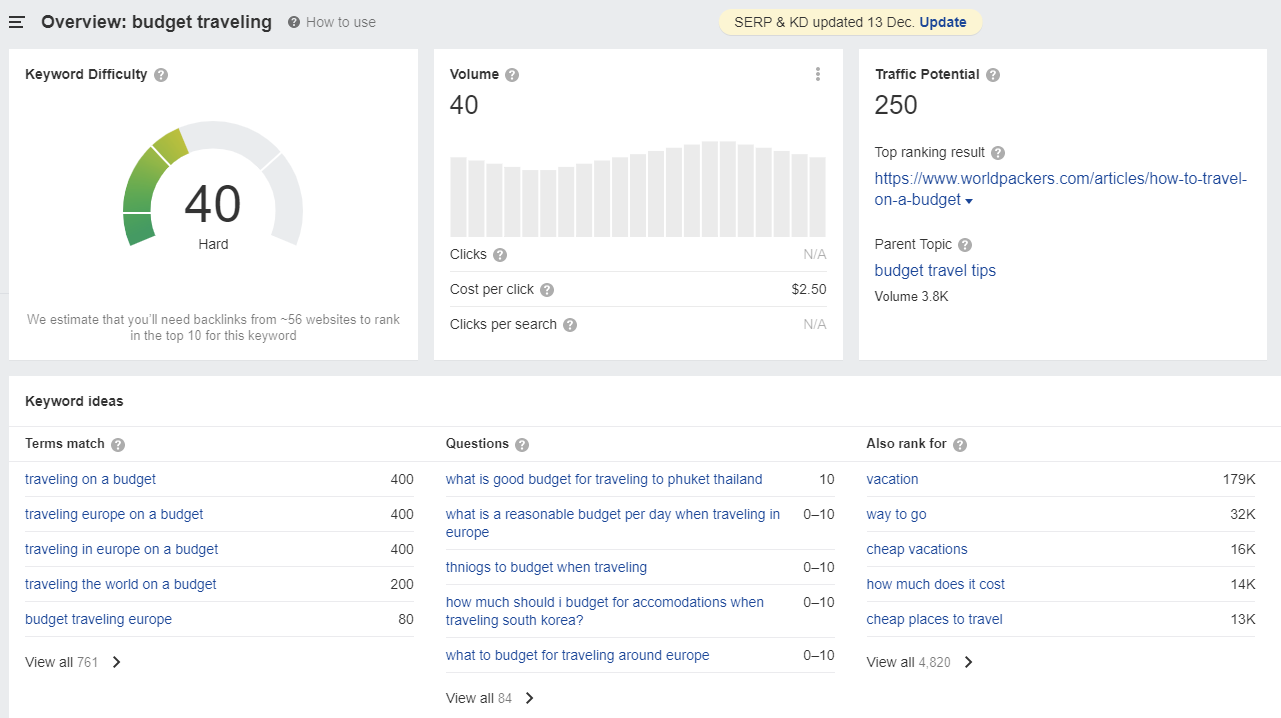
If you’re on a tight budget, use free tools like Answer The Public and Keyword Surfer.
When choosing a topic, we recommend low-competition and long-tail keywords over those with extremely high search volumes. That way, your new travel blog will have a better chance of ranking high on search engine results pages (SERPs).
For example, it will be easier to rank for “best budget hotels in Hawaii” instead of just “best hotels.”
Write High-Quality Content
Once you’ve determined the topic, start writing a blog post. There are several content types to consider:
- Travel guides. Offer tips that help readers make the most of their trips. Depending on the niche, content ideas include “The Best Times to Visit Paris” and “5 Things to Prepare Before Hiking.”
- Recommendations. Provide a list of the best travel destinations, accommodations, gear, landmarks, and local souvenirs.
- Reviews. Write in-depth reviews about your hotel stays or restaurant visits. This way, readers can make informed decisions before going to those places.
- Industry reports. Whether conducting your own research or compiling statistics from different sources, industry reports add more authority to the blog.
- Monetization tips. Most aspiring travel bloggers are looking for ways to make money online. Thus, offering monetization tips will help your blog resonate more with the readers.
To create a blog post, log in to the WordPress dashboard and go to Posts → Add New. After that, follow these methods to produce high-quality content:
- Create a clear structure. Outlining helps you organize the content’s structure, maintain focus on the topic, and prevent writer’s block. It provides a clear roadmap to accelerate the writing process.
- Optimize for search engines. Implement WordPress SEO best practices to increase the chances of ranking high on Google. Immediately answer the audience’s search intent and optimize the article with relevant keywords.
- Use an SEO plugin. Setting up Yoast SEO helps with on-page content optimization. Once activated, the plugin will appear near the bottom of the block editor, offering SEO tools and real-time suggestions.
- Add visual elements. Whether you use original images or stock photos, visuals help writers break up text and boost the reading experience. Some visitors also prefer watching videos over reading text, so embedding one in the article is a good practice.
- Review and edit the article. Once finished, carefully edit and proofread your article. Don’t hesitate to make considerable changes, such as rearranging the structure for better flow or deleting bloated sections to improve readability.
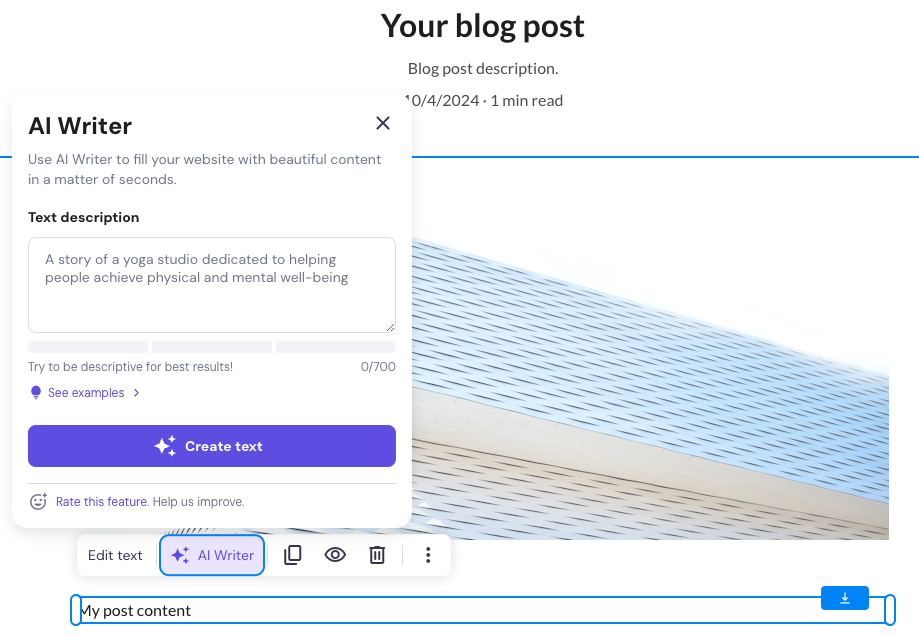
If you are using WordPress and a Hostinger’s Business or Cloud hosting plan, you can use the Hostinger AI assistant plugin to easily generate travel blog posts with the help of the AI. Head to Hostinger → AI Content Creator tab on your WordPress dashboard, enter the blog post description, and let the AI create the content for you.
Our AI tool is also available on Hostinger Website Builder. Head to Blog → Add New Post to start a new post. Once the post editor opens, click Change post title to edit the post’s heading, description, URL, author, date, featured image, and category. After that, you can start writing or generating the post content using AI Writer.
To optimize the website for search engines, go to Analytics → SEO and select a page. From there, describe your page in a few sentences, pick three relevant keywords, and customize the meta title and description.
When starting a travel blog, do not worry about your writing abilities and industry expertise to begin with. By producing blog posts consistently, you will eventually pick up the necessary skills and knowledge.
Expert Tip
Let’s say you’re starting off in a space and you’re not an expert. You can talk about your journey, what you feel, what you like and don’t like, and people can follow you on your journey. As they’re following you, there’s that emotional connection, which is great. But on top of that, you’re learning, and you’re getting better yourself. And eventually, you will become an expert.
Set Up Scheduled Post Publishing
The key to becoming a successful blogger is having a well-planned content strategy and posting consistently.
By default, users can schedule WordPress posts at a specific time and date via the Gutenberg block editor:
- Click the gear icon at the top right corner.
- Under the Post tab, select Immediately next to Publish.
- Schedule the post based on your preferred time and date.

However, this built-in feature has several limitations. One of them is that you can only schedule one blog post at a time.
WordPress also relies on page loads to trigger automated tasks. In other words, it will not publish scheduled posts when no one visits your site at the pre-determined time.
To publish articles in bulk and avoid WordPress missed schedule errors, install WordPress plugins like SchedulePress. Its editorial calendar enables users to schedule hundreds of posts easily. In addition, the tool will check for missed articles and automatically publish them.
If scheduling posts via Hostinger Website Builder, open the target blog page and click the Change post title button to access the Post settings.
Under General, scroll down to Schedule post, toggle on the button, and choose a publishing date.
8. Promote and Grow Your Audience
To become a successful travel blogger, publishing articles is just the beginning – promoting the site is also important. This step is about driving traffic to your travel blog and getting people to read its content.
Here are the most common ways to market a blog and grow its reader base:
- Search engine optimization (SEO). Optimizing the travel website for Google is one of the best ways to promote it for free. Using plugins like Yoast SEO to target specific keywords can help articles rank higher, increasing the chances of gaining new readers.
- Social media marketing. Share your blog posts on social media platforms like Twitter, Instagram, and Pinterest. Twitter is great for word-of-mouth marketing campaigns, while Instagram and Pinterest are more suitable for visual-heavy content. You can also embed social icons on your page to generate traffic.
- Email marketing. With email marketing, bloggers can reach their audience through personalized messages. Grow a subscriber list by inviting people to sign up for your newsletter. To convince them, offer exclusive content like eBooks as an incentive.
- Write guest posts. Guest posting is a great way to get backlinks for your website, consequently boosting its credibility on a given topic.
- Join travel forums and communities. Build connections with other travel bloggers and industry leaders by joining travel communities. Make sure to abide by the forums’ rules, though – some don’t allow self-promotion.
- Pay-per-click ads. If you’re looking for a short-term solution, paid advertising is a great option. To get started, sign up for platforms like Google Ads, Facebook Ads, and Instagram Ads.
Experiment with different approaches to find the right ones. While there are many ways to market your travel blog, focus only on a selected few. Executing two excellent marketing campaigns is better than having 10 subpar ones.
Expert Tip
You have to look at all the marketing channels as an omnichannel approach. Use social media and SEO to collect more emails and continuously promote to your audience via emails to drive conversions. Pick the marketing channel that would be the easiest for you, and eventually, add other channels. Next thing you know, you have four or five channels that you’re going after.
Connect to Google Analytics
Determine the success of marketing campaigns using tools like Google Analytics 4 (GA4). It allows you to analyze traffic metrics and measure the blog’s growth.
To connect a WordPress website to Google Analytics 4, create a new account first:
- Access the Google Analytics 4 homepage, click Get started today, and log in with your Google account.
- Provide an account name in the Account setup. Under Account Data Sharing Settings, tick the Google products and services box.
- Click Next to create a new property. Enter the property name, and select the time zone and currency.
- Head to the next screen and provide your business details, such as industry category and size.
- Click Create, and a Terms of Service Agreement window will pop up. Select I Accept to finalize the setup.
- Once the dashboard appears, head to Admin → Property → Data Streams → Add stream and choose Web.
- Fill in your website address and create a stream name.
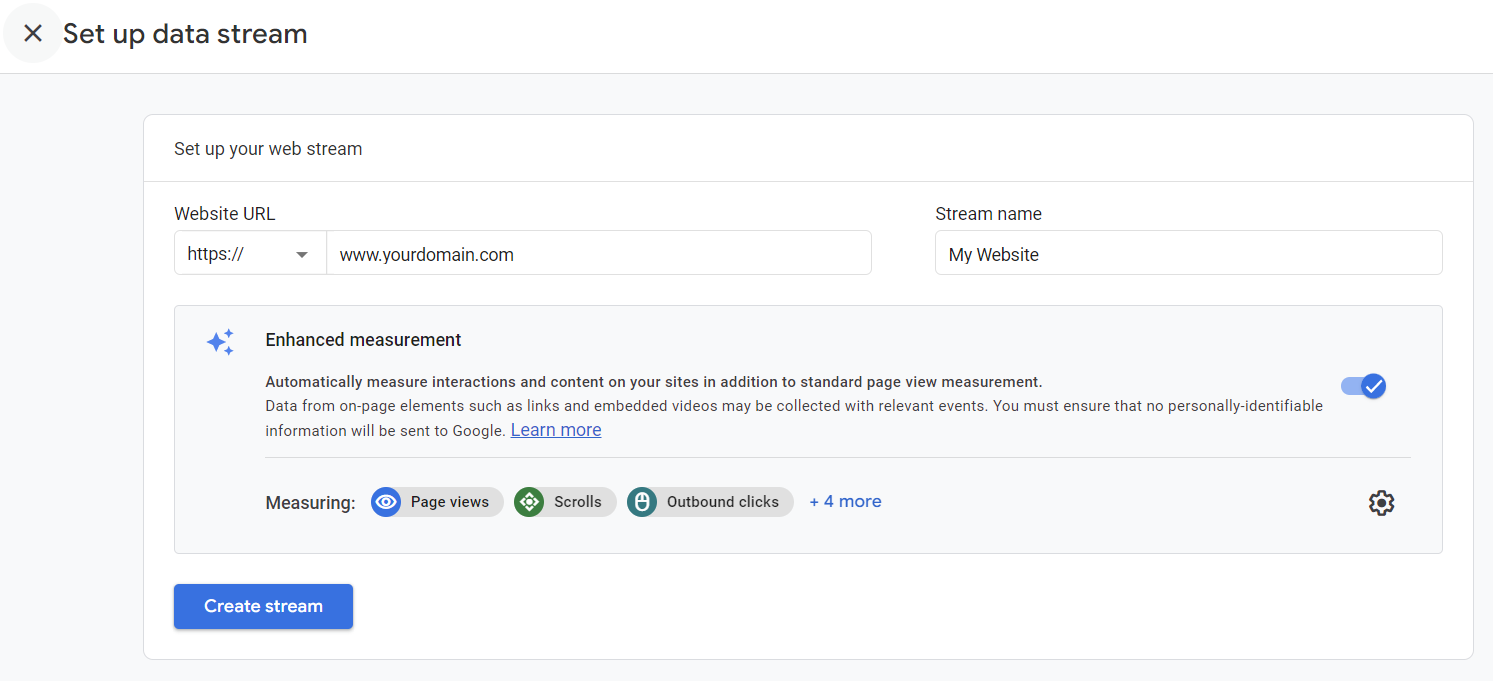
- Finally, click Create stream.
After that, install the MonsterInsights plugin to access Google Analytics 4 from the WordPress dashboard.
Suggested Reading
How to Add Google Analytics to WordPress: A Beginner’s Guide
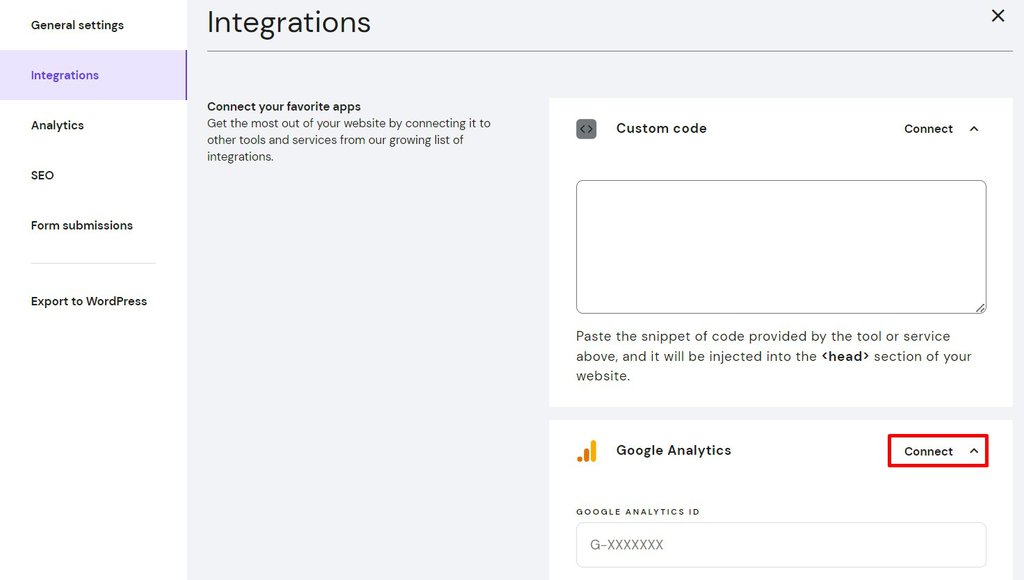
For Hostinger Website Builder users, access Analytics → Integrations from the editing interface. Click Connect next to Google Analytics and enter your account ID.
9. Make Money With Your Travel Blog
Once the travel blog acquires enough traffic, there will be many opportunities to monetize it. Some people can even quit their job and become full-time travel bloggers.
Here are some common ways to make money blogging:
- Advertising. Display ads on the travel blog by signing up for ad networks, such as Google Adsense, Mediavine, and Ezoic. Some platforms may require websites to hit a certain number of visitors before they can register.
- Affiliate links. Become an affiliate of relevant brands such as Saily or eCommerce marketplaces like Amazon. You will receive a commission every time someone clicks on the affiliate link and makes a purchase. Popular affiliate networks include ShareaSale and SkimLinks.
- Sponsored posts. Reach out to brands and pitch article ideas to see if they are interested in sponsored posts. Alternatively, join influencer networks like Mavrck and Linqia.
- Paid press trips. After gaining enough traction, tourism boards and public relations firms may invite you to visit certain destinations with all expenses covered. In exchange, you’ll have to promote those places via articles and social media posts.
- Exclusive content. Sell premium content such as eBooks, courses, merchandise, and photo editing filters.
Most bloggers need at least a year before earning online income, so be patient and keep working towards your goals.
Expert Tip
The biggest thing is to create quality content, give it time, keep tweaking and adjusting continually, and promote your content. As you do those things with multiple audiences, eventually, you’ll be able to generate revenue.
10. Take Blogging Courses to Scale Your Site Even Further
To become a successful travel blogger, joining online courses is essential. It lets you seek insight from industry experts and study proven strategies.
Here are some of the best blogging courses to consider:
- Blogging Masterclass: How To Build A Successful Blog In 2021. A beginner-friendly program that covers basics to advanced blogging strategies, from finding a niche to making money blogging. Lifetime access costs $149.99, with a 30-day money-back guarantee.
- Superstar Blogging by Nomadic Matt. Hosted by Nomadic Matt, this $99 course offers effective strategies for building a successful travel blog from scratch. With over 14 years of experience in the field, it’s safe to assume that Matt knows the ins and outs of travel blogging.
- Complete SEO Course for Beginners by Ahrefs. This free course helps users optimize their site through keyword research, link building, email outreach, and technical SEO best practices.
- Making Sense of Affiliate Marketing. Enroll in this program for $197 and learn how to monetize your travel blog through affiliate marketing strategies.
- Social Media Marketing Mastery. For $149.99, users will get actionable tips to run high-quality ads and make money on social media platforms. These include Twitter, Pinterest, Instagram, Facebook, and YouTube.
- Blog Growth Engine By Adam Enfroy. This travel blogging course focuses on content creation, personal branding, and site monetization. It includes one-on-one calls with an experienced coach to guide you. However, the lifetime access costs $3,900, which is higher than most programs.
Conclusion
Successful travel bloggers explore the world, share their experiences, and attract readers while making money off their content. It’s no wonder many people are interested in becoming one.
Although exciting, starting a travel blog can also be intimidating, especially since the industry has become quite saturated. To launch a successful travel blog, follow these best practices:
- Choose a niche and memorable blog name to establish a strong market positioning.
- Purchase a domain name and sign up for a web hosting service.
- Pick a blogging platform – WordPress or Hostinger Website Builder.
- Determine the blog’s branding identity through a logo, slogan, and consistent visual design.
- Customize the travel blog by choosing a suitable theme, installing the necessary plugins, and setting up the pages.
- Acquire new readers by publishing blog posts consistently and promoting the site through various platforms. These include social media, email, and travel blogging communities.
- Once the travel blog gains enough traffic, monetize it using affiliate links, ads, sponsored posts, and exclusive content. Join travel blogging courses to scale the site even further.
Good luck with launching your own travel blog! We wish you an exciting journey ahead. If you have more questions, check out our FAQ below.
Planning to start a specific type of blog? Check our tutorials:
55 Most Popular Blog Examples
How to Start a Food Blog
How to Start a Book Blog
How to Start an Entrepreneurship Blog
How to Start a Travel Blog FAQ
Find answers to commonly asked questions about travel blogging.
How Much Does It Cost to Start a Travel Blog?
To start a travel blog on WordPress, you need a hosting plan and domain name. An entry-level hosting plan costs around $3-10/month, and a domain name is available for $10-20/year.
Thus, the cost of building a website is between $50-150/year. Note that the amount can be higher, as you might need to purchase a premium theme or hire a professional web designer to give the site a unique look.
How Much Money Can You Make From a Travel Blog?
On average, travel bloggers in the US make around $87,000/year. However, there is no limit on how much money you can earn from blogging. For instance, a successful travel blogger like Nomadic Matt earns a seven-figure income annually.
How Do Travel Bloggers Get Paid?
Travel bloggers make money from advertisements, affiliate links, paid trips, and sponsored posts. Some bloggers also earn income from selling their own products, such as online courses and eBooks.
Do You Need Equipment to Become a Travel Blogger?
Yes. When starting a travel blog, having a laptop helps you create and publish blog posts while traveling. You may also need a camera and tripod to take professional-looking photos and videos.
How to Start a Travel Blog Without Traveling?
If you’re short on time and budget, you can start your own blog without traveling. Start by interviewing your family and friends about their recent holidays, and creating content based on them. Alternatively, write articles about your past travel experiences.

Hasna is passionate about tech, culture, and the written word. She hopes to create content that helps people succeed on the web. When not writing, rearranging, or polishing sentences, she enjoys live music and overanalyzing movies.

Brian is a Content Writer who loves telling complex stories in a simple way. He has written all types of content, including tutorials, blog posts, landing pages, social media posts, white papers, infographics, and YouTube scripts. Follow him on LinkedIn.


Comments
March 30 2024
Thank you so much for spreading so much knowledge, and giving hope to that people who think that they are average, but with this information they can also achieve their dream in their life...